
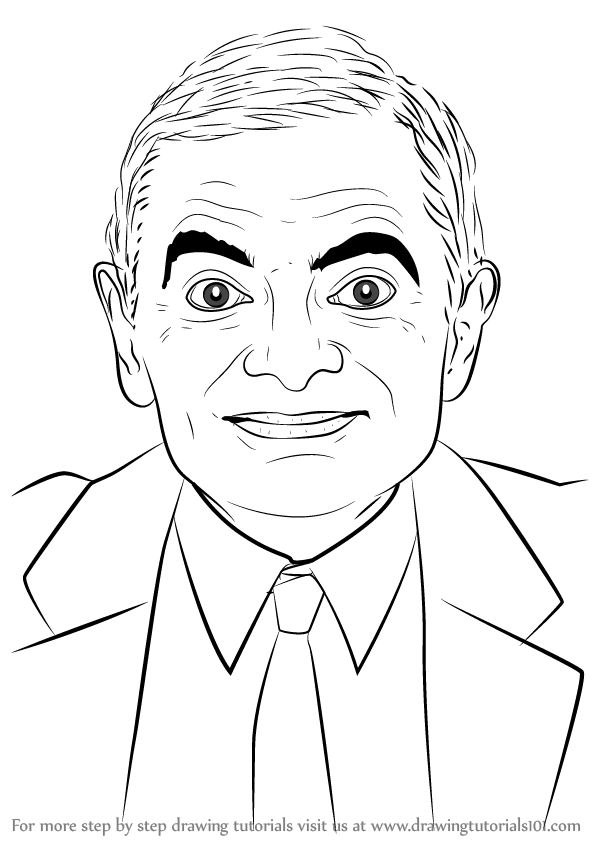
Simple Anime Face.
- Step 1: DRAW a CIRCLE. This circle will be the fundamental element for today's guide. It will serve as a proportion for the face and hair and ...
- Step 2: DRAW THE REST OF YOUR FACE.
- Step 3: DRAW THE MOUTH.
- Step 4: DRAW THE EYES AND NOSE.
- Step 5: DRAW THE HAIR.
Full Answer
How to draw anime for beginners?
Beginner Guide to Drawing Anime & Manga
- Make Light Line Drawings First. Draw using light lines first and then trace over them with darker lines once you are sure that everything is in the right place.
- Use Guide/Construction Lines. Use guide lines to help yourself draw. ...
- Plan Out Your Drawing & Draw Larger to Smaller. Estimate your proportions before you start drawing. ...
- Keep Different Parts of Your Drawing in the Same Stages of Completion. Try and keep the various objects in your drawing in roughly the same state of completion. ...
- Draw Things That Are Hidden. It’s sometimes a good idea to draw things that are hidden by something else. ...
- Do Drawing Exercises. As a beginner artist you can really benefit from some fairly simple exercises of drawing lines and basic geometric shapes.
- Study the Anime Style. To make art that looks like anime and manga you have to understand their defining characteristics. ...
- Check for Mistakes. If you are having trouble spotting your mistakes turn your drawing upside down or hold it up to a mirror.
What are the steps to drawing anime?
The shape of the lower part of the face is as follows:
- Two downwards lines slightly angled inwards (towards middle of face)
- A pair of light curves
- Two more downwards lines that face more inwards than previous pair
- Small curve for the chin
How to draw faces for beginners?
- Start with a circle Draw a large circle and make a horizontal line below it for the chin. Then sketch the jawline. ...
- Draw guidelines on the face There are 2 ways to do this step: Ruler or no ruler. ...
- Draw eyes in the right spot On the face, mark the center line with 4 ticks spread equally apart. The eyes will sit roughly on this line. ...
- Draw a proportionate nose Extend the 2 lines where the inner corners of each eye are located. These guidelines will determine the nose’s width. ...
- Add the eyebrows Extend the nose’s bridge past the eyelids to define the brow bone (this step is optional). These lines should be very light! ...
- Use a triangle shape to draw lips Draw a vertical line down the center of each eye. This will mark the lips’ outer boundary. ...
- Add the ears The Center Line and Line 2 mark the general boundaries for each ear. In-depth tutorial on how to draw an ear from the front
- Draw the hair
How to draw a realistic face step by step?
How to Draw a Realistic Face
- Outline the Face. Begin your drawing by deciding how much of your paper you’d like the face to take up. ...
- Add the Ears and Hairline. Draw the upper portion of a circle inside the original curve at the top of your page. ...
- Mark Guidelines and Start Drawing the Eyes. Across the middle horizontal line, draw five light rectangles. ...
- Complete the Nose. Continue shading down from the eye along the center guideline and rough outline you already created for the tip of the nose.
- Draw in the Lips. As you did with the nose, start to go over your light outline that you previously drew for the lips and teeth.
- Complete the Skin Shading. Start from the left side of the face and work from the outside to the center. ...
- Add Hair to Your Face Drawing. Finally, draw individual curved lines from the center of the top of the head that curve down around the side of the ...
How do you draw a simple anime for beginners?
5 Simple Steps to Drawing AnimeStep 1: Create the Basic Structure of the Face.Step 2: Add Facial Features.Step 3: Draw the Hair.Step 4: Add the Body.Step 5: Add Details and Ink the Drawing.
How do you make an anime face?
0:0216:43How to Draw Faces for Beginners | Anime Manga Drawing TutorialYouTubeStart of suggested clipEnd of suggested clipNow I'm trying to create that jawline started from left making sure the actual tip is not too sharpMoreNow I'm trying to create that jawline started from left making sure the actual tip is not too sharp as the tip of the jaw.
How do you draw your face like anime?
To draw an anime or manga-style face, start by sketching the basic head shape. Draw a circle, then make a vertical guideline down the middle of it. Sketch a horizontal guideline about one-third of the way up from the bottom of the circle to mark the level where the eyes will go.
How do you draw a face for beginners?
Step 1: Start with a circle. Draw a large circle and make a horizontal line below it for the chin. ... Step 2: Draw guidelines on the face. ... Step 3: Draw eyes in the right spot. ... Step 4: Draw a proportionate nose. ... Step 5: Add the eyebrows. ... Step 6: Use a triangle shape to draw lips. ... Step 7: Add the ears. ... Step 8: Draw the hair.
How do I look like an anime girl?
3:576:52How To Look Like An Anime Character - YouTubeYouTubeStart of suggested clipEnd of suggested clipLook more cute and anime is to wear hair accessories. Like little balls or pants will really elevateMoreLook more cute and anime is to wear hair accessories. Like little balls or pants will really elevate. Your hairstyle.
Why is anime called anime?
The word "anime" is simply an abbreviation of the word "animation." In Japan, "anime" is used to refer to all animation. Everywhere else in the world, people use "anime" to refer specifically to animation from Japan. People who like anime often also enjoy Japanese comic books, known as manga.
How do you add anime blush?
A “striped” anime blush is made with just a few line strokes and is fairly easy to draw. Simply make two sets of angled lines around the cheek areas. For a nicer looking blush make the outer stripes a bit shorter and the inner stripes a bit longer. Aim for a combined shape that can fit inside a stretched oval.
How do you make anime faces unique?
0:0015:21Tutorial: Drawing Unique Face Shapes - YouTubeYouTubeStart of suggested clipEnd of suggested clipThe cheekbones. And the jaw line and more specifically the cheekbones and the jaw lines. Really doMoreThe cheekbones. And the jaw line and more specifically the cheekbones and the jaw lines. Really do define a lot of the facial shape.
How do I make an anime character?
8 Steps To Create an anime character online for freeChoose the artistic style you like. ... Choose a skin tone. ... Choose the eye. ... Add tear and eyebrow. ... Choose the nose & mouth shape. ... Change the hairstyle. ... Add gesture and accessories. ... Add texts to express yourself.
How do you draw a face in 10 minutes?
0:267:48How to Draw a Face in 10 Minutes for Beginners | Pencil Sketch - YouTubeYouTubeStart of suggested clipEnd of suggested clipAdd two vertical lines on the side of the circle. This forms the width of face. Next align in theMoreAdd two vertical lines on the side of the circle. This forms the width of face. Next align in the middle of the second grade row. Do the same to the third grade row puts a vertical line in the center.
How do you draw a good cartoon face?
4:5324:32How To Draw Faces- Front View: CARTOONING 101 #1 - YouTubeYouTubeStart of suggested clipEnd of suggested clipThere we go so the first thing I want to do is draw the eyes in here kind of block out these shapesMoreThere we go so the first thing I want to do is draw the eyes in here kind of block out these shapes we're just going to use a circle and we're going to Center it on that.
How do you make a girls eyes?
0:226:58How to Draw Manga Girl Eyes 3 Ways - YouTubeYouTubeStart of suggested clipEnd of suggested clipLine the eyelash lines are thinner at the edges and get thicker in the. Middle next i add a fewMoreLine the eyelash lines are thinner at the edges and get thicker in the. Middle next i add a few eyelashes. You can add as many as you.
How to make a simple nose in anime?
If you want to make a simple nose, just put a dot on the point where the nose guide line and the vertical center line intersect.
How to draw a chin?
Place a horizontal mark for the chin underneath the circle. Find the distance from the center of the circle to the line you drew for the nose. Measure down from the bottom of the circle (or the nose line) to the distance you just found and make a small horizontal mark on the vertical center line.
How to draw a sprite?
1. Place ears on the sides of the head between the eye and nose lines. The top and bottom of each ear will line up with the eye and nose lines you drew earlier. Sketch oblong C-shapes between the guide lines for your ears so they connect to the sides of the circle and jawline.
How to draw a boy's neck?
When you’re drawing a young boy or girl character, make the neck lines closer to the chin that the sides of the jaw. Hold your drawing out in front of you to see if the neck looks too long or short while you’re drawing it. Erase or extend the lines further depending on how it looks to you.
How to draw a jaw in a sandbox?
Outline the jaw for your character. Start on either the left or right side of the circle at its widest point. Draw a line from the side of the circle that’s slightly angled toward the vertical center line. Continue drawing the line until you reach the mark you made for the nose.
How to draw a circle on paper?
1. Draw a circle on your paper with a vertical line running through the middle. Use a pencil so you’re able to erase your lines if you make a mistake. Lightly draw the circle in the center of a piece of paper so you have room to add features to it.
How to make a female neck?
For a female character, place the lines for the neck closer to the chin so it’s narrower. Make straight vertical lines extending from the jaw on each side of the face to make the neck. Younger manga or anime characters will have a narrow neck since they aren’t as muscular or defined.
Step 1: Draw the Face
Grab your pencil and draw a curve with a point at the end of it. Make sure that both sides of the face are symmetrical.
Step 2: Draw the Neck
The neck is very simple to draw. It's just two curved " l's " back to back.
Step 4: Draw the Tiny Nose
The nose is another simple step! It's just a tiny flick or dot if you want it to be.
Step 5: Add the Mouth
You can show many expressions with the mouth, so it's up to you to decide what she doing with her mouth. I'm going to make her excited because everyone loves a happy anime character!
Step 6: Now for the Glamorous Hair!
This step is also one of my favourite steps because I love drawing hair! It can show a lot about your character.
Step 7: Draw Blush and Eyebrows on Your Character's Face
All you need to do is draw two squiggles. One at one side of the face, one at the other. This will make your anime character cute! I didn't want to draw eyebrows because I thought it had enough expression. You could add eyebrows if you want.
Step 8: Finish With Some Colour
You don't have to add colour but you can if you want to. I personally don't like colouring, mainly because I'm not good at it!
Step 1: DRAW a CIRCLE
This circle will be the fundamental element for today's guide. It will serve as a proportion for the face and hair and everything.
Step 2: DRAW THE REST OF YOUR FACE
After you draw the circle, draw two lines both pointing inwards at a tiny degree, and connect them like in the picture. Draw another line straight through to the chin.
Step 3: DRAW THE MOUTH
Draw the mouth. It can be closed, opened, teeth gritted, frowning, whatever. You have to draw the mouth so that the line going straight through the head would be in the middle.
Step 4: DRAW THE EYES AND NOSE
Again, you can do anything with the eyes. You have to draw the eyes above the bottom part of the circle. The nose would be where the bottom part of the circle meets with the vertical line.
Step 5: DRAW THE HAIR
I decided to put the anime girl's hair into a ponytail (you'll see later), but honestly it doesn't matter. You can do any type of hairstyle you want. I put her hair in a blue bow.
Step 6: DRAW ON THE NECK
This is an optional, but I did it. Draw the neck. It can't be too wide, or too thing. After you finish the neck, branch it off to opposite directions to make the shoulders.
Step 7: TRACE THE PICTURE WITH a SHARPIE
I used a Sharpie pen because I work best with those, but using a thin Sharpie marker could work too. Then erase all the pencil marks.
How to draw anime characters?
While artists have varying preferences about how to structure an anime character’s head and face, they all start with the same basic principle: First draw a circle, and then draw a horizontal line and vertical line directly ...
How to draw anime girl eyes?
Start by sketching a curved upper eyelid, then draw a short line extending down from the outer corner of the eye. Leave the inner corner of the eye open for a softer look. Then, add a circle in the middle of the eye as the iris. Draw a smaller circle—the pupil—in the middle of the iris.
How long should an anime character's legs be?
The legs of an anime character should be approximately as long as the top half of the character, from the top of the head to the waist. Finally, add in the arms. A good rule of thumb is to align the elbow with the character’s waist, and then extend the rest of the arm (including the hand) to about mid-thigh.
How to make a reflection in the eye?
Leave the inner corner of the eye open for a softer look. Then, add a circle in the middle of the eye as the iris. Draw a smaller circle—the pupil—in the middle of the iris. To create primary and secondary light reflections, add in one or two additional circles within the iris.
What is the difference between a character's nose and mouth?
The character’s nose and mouth will typically be much smaller and simpler than the eyes. The nose, for instance, may just be two small lines that represent the nostrils. Similarly, the mouth may be a simple curved line.
What pen do you use to highlight a character?
While you will mostly ink with a black pen, it can also be helpful to have a white jelly pen on hand—you can use this to add highlights, like the reflection points in the character’s eyes. You may also choose to add additional colors with colored pencils or medium of your choice.
Popular Posts:
- 1. are there any anime stores near me
- 2. a sister's all you need anime news network
- 3. is dinosaur king an anime
- 4. where to watch tight rope anime
- 5. can non japanese make anime
- 6. how to draw anime body step by step
- 7. where to watch oregairu anime
- 8. what is amnesia anime about
- 9. where can i watch mob psycho anime
- 10. why my hero academia is the best anime