How to Draw an Anime Female Face 3/4 View
- Step 1 – Draw the Top Part of the Head. Head top construction. ...
- Step 2 – Draw the Center Line For the Face. ...
- Step 3 – Draw Bottom of the Face. ...
- Step 4 – Draw the Facial Features. ...
- Step 5 – Drawing the Hair. ...
- Step 6 – Cleaned Up Line Drawing. ...
- Step 7 – Apply Color. ...
- Step 8 – Apply Shading.
How do you make a 3/4 face anime?
0:0021:34How to Draw Anime Female Face 3/4 View [Slow Narrated Tutorial] [No ...YouTubeStart of suggested clipEnd of suggested clipThis character is going to be looking towards left and then I'm going to draw two curves thatMoreThis character is going to be looking towards left and then I'm going to draw two curves that connects the chin with the circle.
How do you draw eyes in a 3/4 in anime?
2:379:01How to Draw Anime Eyes in Different Angles TUTORIAL - YouTubeYouTubeStart of suggested clipEnd of suggested clipThe 3 4 view is going to be something like this actually we can already kind of use this shape rightMoreThe 3 4 view is going to be something like this actually we can already kind of use this shape right here. So for this perspective the character is kind of facing a little bit to the side.
How do you draw a 3/4 pose?
2:4211:51How To DRAW A BODY In 3/4 View EASILY With Reference! - YouTubeYouTubeStart of suggested clipEnd of suggested clipI'm going to start with a head and the first thing I'm going to draw is of course a circle then theMoreI'm going to start with a head and the first thing I'm going to draw is of course a circle then the line going down here and we have the middle of the face. And then we can connect this once.
How do you draw a 3/4 character?
0:007:14Drawing a Character Turned (3/4 view) + adding Depth (Easy-ish)YouTubeStart of suggested clipEnd of suggested clipThe face to the left and down a little watch your character looking up scoot the face up. WatchMoreThe face to the left and down a little watch your character looking up scoot the face up. Watch character looking down scoop the face down. I'll end with my character facing to the right.
How do you draw a 3/4 angle eye?
3:4320:51How to Draw Eyes from Different Angles, Pt. 3: 3/4 View - YouTubeYouTubeStart of suggested clipEnd of suggested clipAnd the upper eyelid. It's not curved quite so much it's more of like a direct angle there. And thenMoreAnd the upper eyelid. It's not curved quite so much it's more of like a direct angle there. And then we know that there's some depth between the eyelid and the eyeball. So i'm putting the eyeball.
How do you do Ibispaint eyes?
1:206:16[Tutorial] How to color eyes on IbisPaint X || Voice over + Eng SubYouTubeStart of suggested clipEnd of suggested clipLike this add a new layer and turn clicking again click blue and choose multiply use space color toMoreLike this add a new layer and turn clicking again click blue and choose multiply use space color to draw to. Hold you can reposition it or use tool to make it rounder use the brighter.
How do you draw a 3/4 body girl?
1:5131:50How to Draw Anime Girl Body Proportions 3/4 View [No Timelapse]YouTubeStart of suggested clipEnd of suggested clipSo make sure you check that one out. And then is the is the neck and by the way this is the line forMoreSo make sure you check that one out. And then is the is the neck and by the way this is the line for the eyes and this is the line for the center of the face this is line for the ear.
How do you draw a 3/4 nose?
Step 1: Draw a 3D shape with trapezoid base. Decide on the angle you want to draw the nose. ... Step 2: Add circles to the base. ... Step 3: Draw the upper nose bridge. ... Step 4: Draw the nose's tip and bridge. ... Step 5: Outline the nostril wing. ... Step 6: Draw the nostril. ... Step 7: Prepare for shading.
How do you draw a 1/4 face?
0:078:24How to Draw the Face- 3/4 Point of View - YouTubeYouTubeStart of suggested clipEnd of suggested clipSo like any other face you start out with a circle. Then depending on how extreme you want 3/4 viewMoreSo like any other face you start out with a circle. Then depending on how extreme you want 3/4 view to be you bring down the line for the middle of the face um.
How do you draw a 3/4 portrait?
0:0022:14How to Draw a 3/4-View Portrait (Part 1: Proportions) - YouTubeYouTubeStart of suggested clipEnd of suggested clipThe head is going to kind of start out the same way as you would from a front facing we're justMoreThe head is going to kind of start out the same way as you would from a front facing we're just going to change the angles a little bit more.
How do you make an anime face easy?
To draw an anime or manga-style face, start by sketching the basic head shape. Draw a circle, then make a vertical guideline down the middle of it. Sketch a horizontal guideline about one-third of the way up from the bottom of the circle to mark the level where the eyes will go.
What is a 3 4 view in art?
You'll see equal amounts of both sides of their face: 3/4 view, where your subject turns their face just slightly in one direction until you cannot see their far ear anymore: 2/3 view, where the subject turns their head until the line of the nose is almost touching the outline of their cheek on the far side.
Where to draw a male mouth?
Due to the mouth being curved and somewhat indented in the head you will want to draw most of it’s shape to be on the forward side of the face (left side of the center line). As this is a male mouth you can draw it fairly large (wide) in comparison to a female one.
Can you color an anime male face?
Anime male face 3/4 view coloring. Once done with the line drawing you can add some color. If coloring on paper you may want to leave the highlights in the hair (shown in next step) white. As these can be fairly random you do not necessarily need to outline them before hand but you can if you find it easier to do so.
Where should the mouth be on 3/4 view?
It doesn’t protrude out of the face as much as the nose. So it should be slightly more towards the middle of the eyes compared to the nose.
What does 3/4 view mean?
In the 3/4 view, one part of the face is further away from the viewer compared to the other part. So one thing you need to know is that objects of the same size will look smaller when it’s further away from you. For example, a car right in front of you would look a lot bigger than a car 100 meters away from you.
What happens when you view the eye in 3/4?
When in the 3/4 view, the eye that is further away will be slightly smaller compared to the other eye that’s closer to us. However, don’t make it too small since the difference in distance isn’t too big. Also, note that the height of the eyes should still be the same, just the width will be smaller.
What is the nose in anime?
The nose. The nose is usually shown as a simple dot or line on the face in anime style. However, placing it correctly is important. The nose protrudes out of the face. So perspectives come into play when in 3/4 view, it should not be right down the middle of the eyes. It should be more towards the eyes that are further away.
Step 2
Divide the circle into 2 parts vertically. (Fig. 2) The center line of the division must be placed slightly on the left and not on the middle of the circle. This center line is where the nose and mouth will be aligned.
Step 3
Since the head is slightly facing to the left, the ear and cheek of the other side of the face will be visible. See fig 1.
Step 4
Fig. 2. Mark the area for the nose and mouth according to the alignment of the center line.
Step 5
Place the nose and the mouth in the center line and add some details needed. Always stick to the guidelines of the 3/4 view and place the parts such as the eyes to its proper place, or else the head will be out of proportion and distorted ( review the head construction tutorials)
Just another Note of Interest to Remember
Observe how the dummy head faces the front and slightly turning. Notice how the left part of the face became visible. This is what you have to consider when drawing 3/4 view of the head.
How to draw a face?
STEP 1- DRAWING THE JAW. You should start by drawing the Jaw and left side of the face. First, draw a curved convex line for the forehead, next a concave line for the side of the face . After you should draw another convex line towards the center and another one after to the right. The pointy end will be the chin.
What is anime art?
Anime, also known as manga, is one of the most popular art styles. You can find tons of anime comics, movies, and drawings in general on the internet. The cool thing is that in this tutorial I will teach you how to create your own anime drawings.
Where is the bottom part of the hair drawn?
The bottom part will be surrounding the neck and laying on top of the shoulders.
Step 1
Using an HB pencil, draw a circle. Then draw a small line at the bottom to mark the bottom of the chin. This line should be roughly 1/2 the diameter of the sphere.
Step 2
Using a 2B pencil, connect the left side of the circle to the chin. Just a simple curve. Details will be added later.
Step 3
In this step, we’re going to draw 4 lines down the front of the face and 1 line down the side with an HB pencil.
Step 4
This step is optional. I highly recommend it for your first few tries or until you are able to somewhat accurately eye the measurements. Draw a ruler beside your drawing and put ticks on it, separating it into 8 equal sections.
Step 5
With an HB, make 3 small ticks on line E where ‘Center Line’, line 2 and line 3 intersect.
Step 6
For all the facial features, use a 2B. If you’re drawing guidelines, use an HB with very little pressure.
Step 7
The eyes will go on the center line. The left eye sits between the edge of the face and the bridge of the nose while the right eye is placed between line F and the right edge of the face. Make use of the space. Do not draw your eyes too small.

Step 1 – Draw The Top Part of The Head

Start by making a circle for the top part of the head. Now think of the circle as a sphere and through this sphere draw a line that will determine the middle of the head. This line will curve around the sphere sort of like if you were to tie a string around a ball and look at it from the same angle at which you want to draw the fa…
Step 2 – Draw The Center Line For The Face
- From the center line of the sphere project a straight line that is slightly angled inwards (towards center of the sphere). This line will be the middle of the lower part of the face.
Step 3 – Draw Bottom of The Face
- Draw the sides of the bottom part of the face by adding lines going from the sphere to the bottom of the center line.
Step 5 – Drawing The Hair
- Normally you can think of the hair as being split into the front, sides, and top/back. For this particular stile there is really not much to the “front” side to the hair as it is combed to each side and overlapped by the sideburns hair. To draw this particular hairstyle you can pretty much trace the top part of the hair along the shape of the the top of the head but a slight distance away. As i…
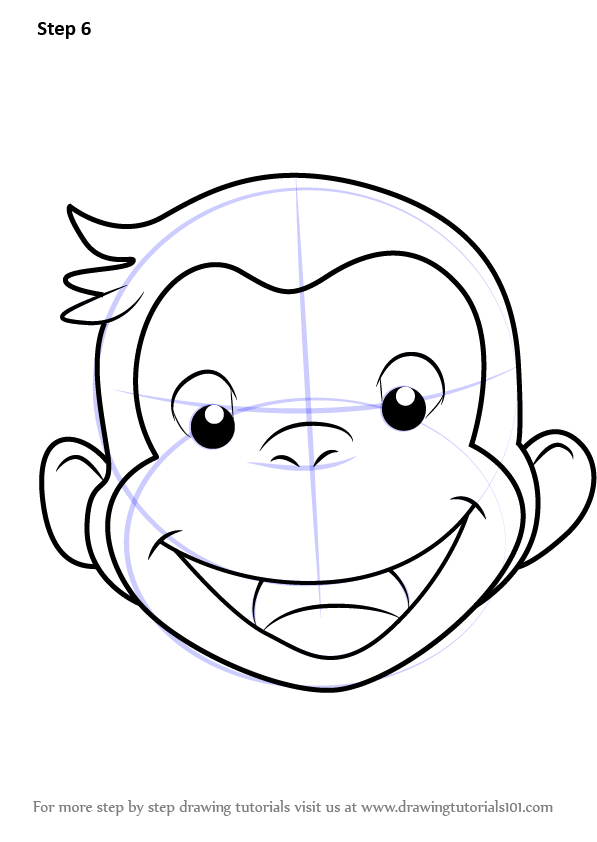
Step 6 – Cleaned Up Line Drawing
- At this point you can remove any of the construction lines from your drawing and erase any parts hidden by the hair. You should have a clean line drawing after you are done.
Step 7 – Apply Color
- For this step simply fill in each area with the appropriate color. If you are coloring on paper then leave the highlight areas of the hair and the reflections in the eyes white. If coloring digitally add them in at the very end. For more on coloring anime charters you can see: 1. Beginner Guide to Picking Colors When Drawing Anime & Manga 2. How to Color an Anime Character Step by Step
Step 8 – Apply Shading
- As in many other tutorials here on AnimeOutlinefor this particular drawing we will simply shade the areas that tend to have shadow in common lighting conditions with the light coming from above. Add shadow/darken the following places: 1. Some minor shadows from the hair 2. Tiny shadows around the eyelids as that area is sort of indented so usually less light will reach there …
Conclusion
- As already mentioned this particular example shows some slightly more realistic facial features but the same steps can be applied to drawing a more traditional looking anime character. Also keep in mind that the proportions used in this tutorial are just recommendations and can change based on variations in the style. It should also be noted that a 3/4 view of the face is generally h…
Popular Posts:
- 1. is anime appropriate
- 2. where to find titans in anime fighting simulator
- 3. how to draw anime manga step by step
- 4. is saiki k the most powerful anime character
- 5. did escanor die in the anime
- 6. what anime character are you quiz buzzfeed
- 7. a romance anime with lots of kissing
- 8. where can i watch candy candy anime in spanish
- 9. how much anime is on funimation
- 10. where can i watch dance with the devils anime