
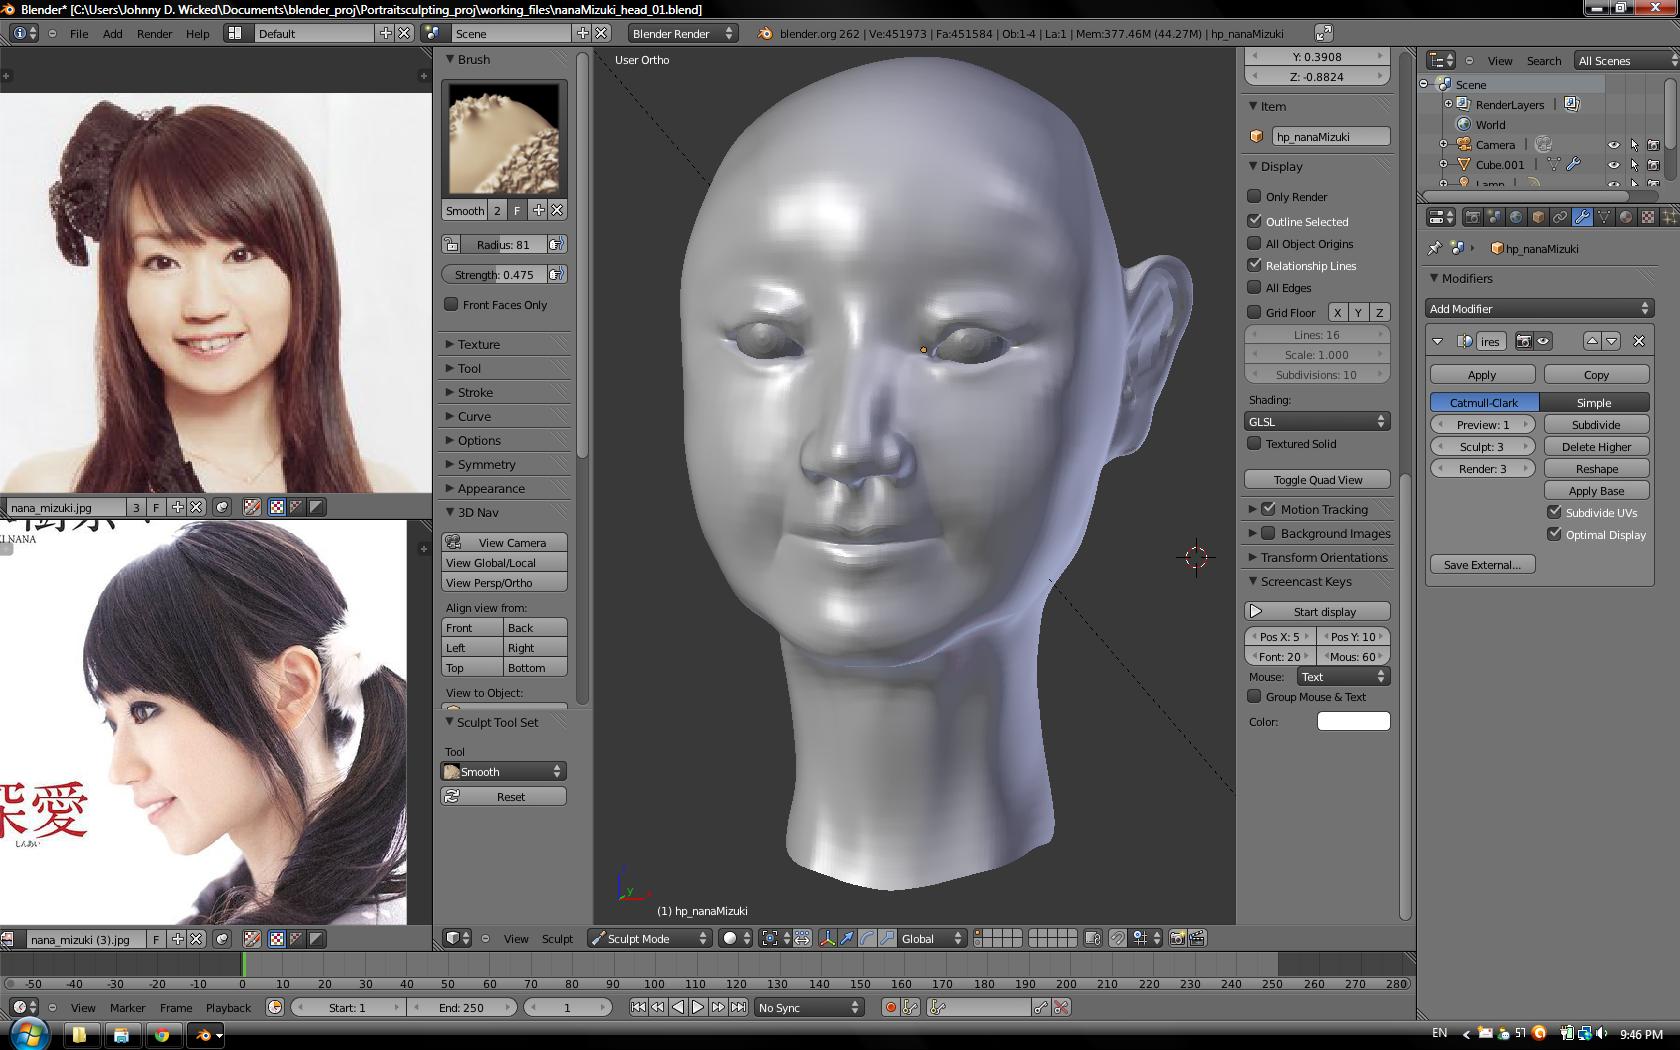
Launch Blender, and open the.blend file. This scene comes with the sculpture that you can see in the following figure: Figure 7.34 – The anime head sculpture
Full Answer
How to use Blender sculpting in Blender?
You can notice that there is a “Sculpting” preset available here which is great for Blender Sculpting. It automatically opens you in the Sculpt Mode of the 3D viewport with the high-poly sphere already available for you to sculpt on. But it is more understandable to use the “General” preset.
What is the best way to practice drawing in Blender?
Right now I would recommend you to activate the Dyntopo, Constant detail and try messing around in the Blender. Use all of the different tools and try to create something that you like. It is important to try using the knowledge in practicing.
How do I use Substance Painter in Blender?
To quickly apply the textures made in Substance Painter within Blender, use the Node Wrangler Addon Shortcut Control+Shift+T and select all the maps. To achieve the same texture resolution in all objects, you need to have the same Texel Density, and you can get that with the Free Texel Density Checker Add-on.
Can I use blender to create hyperrealistic models?
But to achieve the hyperrealistic results sculpting can be used on any kind of model, because it allows for easy adding of details. When you open Blender, it is possible to choose the interface preset depending on your goal.
How do you sculpt anime characters on Blender?
1:3221:21[#02] Anime Character 3D Modeling Tutorial 2020 - YouTubeYouTubeStart of suggested clipEnd of suggested clipYou hold the shift button. And click middle mouse to shifter view and you hold ctrl. And use theMoreYou hold the shift button. And click middle mouse to shifter view and you hold ctrl. And use the middle mouse button to zoom.
How do you make anime in Blender?
4:5924:2190's Anime in Blender - Tutorial - YouTubeYouTubeStart of suggested clipEnd of suggested clipThen what i'll do is open up a new project in blender. And set up a camera approximating ourMoreThen what i'll do is open up a new project in blender. And set up a camera approximating our reference. And then begin to construct these different compositional layers we identified.
Can you sculpt on Blender?
By offering the sculpting and the polygonal modeling toolsets side by side, Blender greatly simplifies the transition between conceptual research and final model production. Experience the joy of sculpting organic subjects using the built-in sculpting feature set of Blender.
How do you sculpt good in Blender?
1:3327:27Learn to Sculpt in Blender - Quick Start Guide - YouTubeYouTubeStart of suggested clipEnd of suggested clipIf you want to sculpt inwards you can hold on a control key and just sculpt regularly as well andMoreIf you want to sculpt inwards you can hold on a control key and just sculpt regularly as well and that's going to sculpt inwards. So left mouse button to sculpt out and control to sculpt.
How do you do 80's anime effect?
2:028:30Retro Anime Filter in Clip Studio Paint - YouTubeYouTubeStart of suggested clipEnd of suggested clipUse thin brushes to mimic inking. And then flatten the characters. And sell shade. Them. This effectMoreUse thin brushes to mimic inking. And then flatten the characters. And sell shade. Them. This effect isn't too difficult to achieve let's get right into it.
How do you make anime textures in blender?
1:0646:48Procedural shaders for stylized/anime medieval buildings in blenderYouTubeStart of suggested clipEnd of suggested clipAnd we're going to start stylizing this by adding a noise texture. And let's plug it into our mortarMoreAnd we're going to start stylizing this by adding a noise texture. And let's plug it into our mortar size this is going to make it pitch black. But we need to add a mix rgb to control it.
Is Sculpture Haram in Islam?
A section of Islamic clerics, mostly Hefajat-e-Islam leaders, have issued a "fatwa" (religious edict), saying that construction of idol or sculpture of any living being is forbidden in Islam.
Is Blender better than ZBrush?
ZBrush is better suited for modeling intricate details, while Blender is better for more general modeling. If you're looking to create models with a lot of small details, ZBrush is the better option. However, if you need to create simpler models or don't need as much detail, Blender will probably serve you better.
How do you sculpt for beginners?
Sculpting for Beginners: 9 Essential Tips and Tricks to Get...Choose a Work Space. ... Experiment With a Variety of Tools. ... Sketch a Design. ... Build an Armature. ... Add Filler to the Armature. ... Start With the Basic Form. ... Forming/Adding Sections/Adding Texture. ... Curing.More items...•
How long does it take to learn sculpting in Blender?
There is no specific time range because there are lots of factors that influence the learning duration, but in general it takes 4 to 8 weeks for a person who knows something about 3D and for a non-3D background person it may be around 6 to 10 weeks.
Is zbrush free?
If you are completely new to 3D and want to see if digital sculpting is for you, or just want to mess around, this is a great way to start. And it's completely free for non-commercial use!
What is UV editing in Blender?
The UV Editor is used to map 2D assets like images/textures onto 3D objects and edit what are called UVs. UV Editor with a UV map and a test grid texture. The most flexible way of mapping a 2D texture over a 3D object is a process called “UV mapping”.
What is Blender Sculpting?
Usually Blender Sculpting is used for organic modeling. Creating models that would be hard to create using the standard modeling ways. Usually these models are of living things such as animals, thus it is called organic.
What is 3D sculpting in Blender?
Everything is explained step by steps in detail. Digital Sculpting or 3D Sculpting is a way of modeling that mimics real-life sculpting with clay. Meaning that it is a really smooth way of modeling, as if the object you modeling is made out of clay.
What is Dyntopo in Blender?
Blender Dyntopo. The last interesting and important feature is the Dyntopo. Dyntopo is short for dynamic topology. It is the feature that allows you to change the level of topology and add new geometry on the fly. In the previous segments we needed to increase the detail level before sculpting.
Which brush is used to draw?
The most basic brush that simply pushes inwards or outwards faces where you point your cursor. Draw Sharp – very similar to the last one, but uses a much sharper Falloff. Can be used for creating small details such as wrinkles. Clay – again, similar to the Draw, but the brush is flatter.
Can you select faces with a box mask?
Box Mask – Same as regular Mask, but instead of the circle brush, you now can select faces via box select. Box Hide – same as the Box Mask, but it does not mask selected faces, but hides them. Mesh Filter – deforms the whole mesh at the same time in the same way. For example Smooth brush can be applied here.
Does simplify work with Dyntopo?
Simplify – only works with the Dyntopo enabled. Changes the level of detail (resolution) of the model. Mask – masks the part of your object, that you can see by the black highlight. The masked parts of your object are not affected by the brushes. Draw Face Sets – adds a new face set each time you press LMB.
Is sculpting important in Blender?
It can be seen that sculpting is a really important part of the Blender and 3D modeling overall. There are things that are easier and better done using sculpting instead of the usual modeling and there are even some things that can be done only using sculpting. Overall, it is an important skill that you need to master if you want to be a proper 3D modeller. We hope you enjoyed this Blender Sculpting tutorials. Also have a look at our other Blender Tutorials and 3D Model Reviews.
Introduction
In this tutorial, I will show the process of making the “Space Cadet” 3D Illustration. The main focus is to create a cartoon character with realistic materials.
Concept of the image
This image is based on a concept by the French artist Guillaume Singelin, who is a comic book artist and illustrator. Heavily Influenced by Toriyama and Otomo, and focused on making cartoon characters. This image portrays a space cadet.
Modeling Loop process
I always use the same method for modeling. First making a basic block out of the shapes until my eyes get tired of the image, and then I make a render and draw over it what is missing. That helps me out thinking about what I need to focus on next. I do this over and over until I can no longer find details to add or modify.
UVs and Texel Density
Mark all the seams and then Unwrap them to make the UVs of all the meshes, then apply the same texel density to all of them to have the same texture resolution – I used 40.96 px/cm. Finally, join a maximum of meshes per tileset. This project took a total of nine 4K tilesets.
Reference board
I make a board to assemble my references, divide the board by meshes and start looking for objects that have the textures I want to achieve in each one. In this project, the essential references were the spacesuit, the hands, and the freckles. That's why I have a lot more images of them.
Importing and baking
When Importing the mesh, be sure to use the PBR – Metallic Roughness template and OpenGL at the Normal Map Format. After that I start baking the first Tileset, because the size of the textures is in 4K, that's the measure I use in Output Size at the Baking. In the ID Map Change the Color Source to Vertex Color. With that, you will mask easily.
Emissive material
First I make a 4K Image that I will use as alpha in the screen monitor, then add the Emissive channel inside Substance Painter. I use this alpha as a base, but I will be adding multiple layers over it. First, an Ambient Occlusion to make the center look brighter than the corners, then a scanline effect to give an oldish feeling.
Popular Posts:
- 1. where can i watch dubbed anime
- 2. are anime misunderstandings bad
- 3. a nervous anime girl
- 4. how to marry a anime character
- 5. where to get clips for anime edits
- 6. where to watch full dive rpg anime
- 7. what anime that has the most episodes
- 8. how to do digital anime art
- 9. a anime harem school
- 10. how to draw two anime characters kissing