
What are the steps to drawing anime?
The shape of the lower part of the face is as follows:
- Two downwards lines slightly angled inwards (towards middle of face)
- A pair of light curves
- Two more downwards lines that face more inwards than previous pair
- Small curve for the chin
How to draw anime Smile?
Step-by-Step Instructions for Drawing an Anime Smile
- Begin by drawing the squinting eyes. Use thick curved lines to draw a shape that is pointed on one side and that splits into two points on the other. ...
- Use curved lines to outline the shape of the nose, the contour of the upper lip, and the open-mouth, toothy grin. ...
- Begin outlining the face. Draw curved lines to form the hair at the sides of the face. ...
How do you draw yourself in anime?
Beginner Guide to Drawing Anime & Manga
- Make Light Line Drawings First. Draw using light lines first and then trace over them with darker lines once you are sure that everything is in the right place.
- Use Guide/Construction Lines. Use guide lines to help yourself draw. ...
- Plan Out Your Drawing & Draw Larger to Smaller. Estimate your proportions before you start drawing. ...
- Keep Different Parts of Your Drawing in the Same Stages of Completion. Try and keep the various objects in your drawing in roughly the same state of completion. ...
- Draw Things That Are Hidden. It’s sometimes a good idea to draw things that are hidden by something else. ...
- Do Drawing Exercises. As a beginner artist you can really benefit from some fairly simple exercises of drawing lines and basic geometric shapes.
- Study the Anime Style. To make art that looks like anime and manga you have to understand their defining characteristics. ...
- Check for Mistakes. If you are having trouble spotting your mistakes turn your drawing upside down or hold it up to a mirror.
How to draw anime facial expressions?
One of the ways to draw a content or happy face when drawing Anime expressions is to create a careful half-smile with the lips closed, and draw the eyes open not too wide, as well as have the eyebrows follow the shape of the eye. To show laughter or joy, we can further manipulate the facial features.
How do you draw a head side view anime?
1:128:10How to Draw SIDE VIEW Anime Face (MALE) - YouTubeYouTubeStart of suggested clipEnd of suggested clipSo yeah basically make the chin. Strong and then we're gonna draw the neck just start from here andMoreSo yeah basically make the chin. Strong and then we're gonna draw the neck just start from here and then make another one on the side of the circle. Now we're going to draw the eyes.
How do you draw a side anime character?
0:0028:15How To Draw Anime Girl Side View [Slow Narrated Tutorial] - YouTubeYouTubeStart of suggested clipEnd of suggested clipFor the head and then a straight vertical line for the center of the body hmm. And then let's finishMoreFor the head and then a straight vertical line for the center of the body hmm. And then let's finish off the cheek. We'll just start off like this by the way I'm going to draw a little bit stronger.
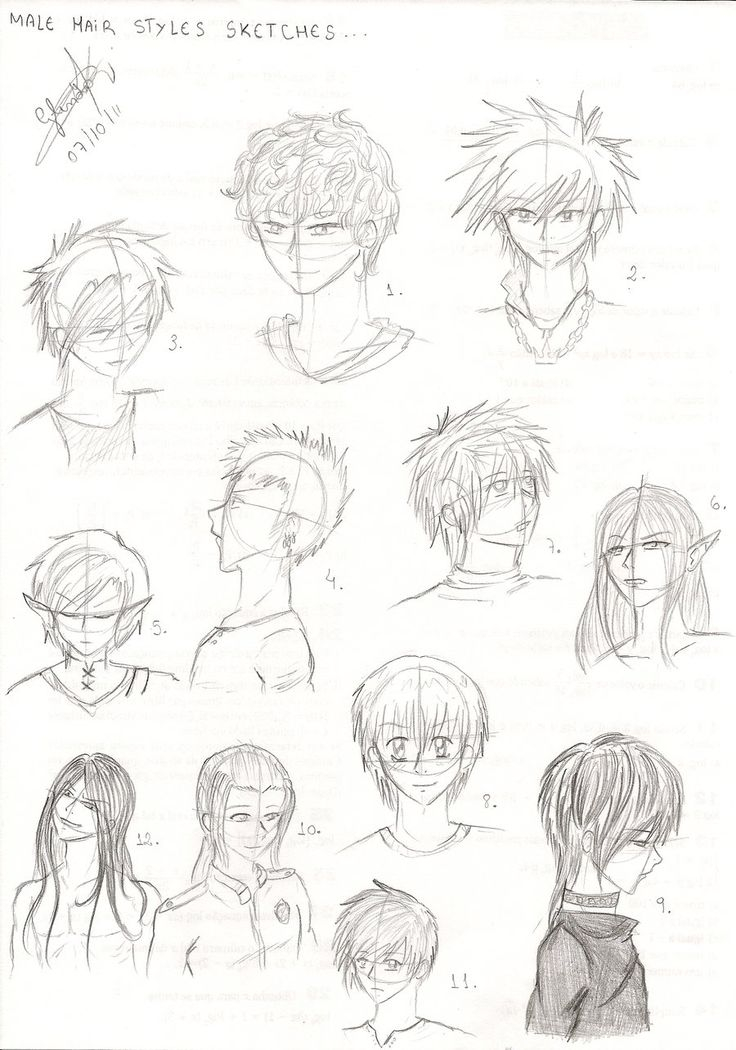
How do you draw anime hairstyles?
Draw an outline of the head using a pencil, this will only serve as your guide in drawing the hair. Draw the hairline. Imagine a long hair style you want and to which direction the hair strands flow. Try drawing simple long slanted and curved lines of the hairstyle you want.
How do you draw anime hair easy?
4:4819:20[TUTORIAL] How to DRAW Anime Hair! - YouTubeYouTubeStart of suggested clipEnd of suggested clipOne thing you also want to make sure that you're not doing is drawing the hair right on top of theMoreOne thing you also want to make sure that you're not doing is drawing the hair right on top of the head uh this can cause the hair to look super flat. And kind of really ugly.
How do you draw a hot guy?
0:014:21How to Draw HOT Anime MALE ANATOMY - YouTubeYouTubeStart of suggested clipEnd of suggested clipSo just draw a really long line and add two triangles on each side of his neck after that add twoMoreSo just draw a really long line and add two triangles on each side of his neck after that add two circles on each side.
How do you do side view?
1:255:08How to Draw a Side View (Profile) for Beginners - YouTubeYouTubeStart of suggested clipEnd of suggested clipAnd bring that lower lip down here to meet it bring it down a little bit and out for the chin. AndMoreAnd bring that lower lip down here to meet it bring it down a little bit and out for the chin. And once you have that shinning that cut foot chin. Just bring it straight back into here.
Why is drawing hair so hard?
Hair is very difficult to draw, because what we see is different than what we know. You can't simply draw all the hairs in the form of lines, because that's not what we see when we look at hair. What we see must be simplified to lines and shades, and there are many ways to do it.
How do you make a cartoon hair?
18:3626:47How To Draw Hair For Women & Girls: CARTOONING 101 #9YouTubeStart of suggested clipEnd of suggested clipDifferent lines as we come down and around to give that appearance of the hair coming. Around. I donMoreDifferent lines as we come down and around to give that appearance of the hair coming. Around. I don't like to go too crazy like I said with these lines. So use them sparingly.
How do you make anime faces?
0:532:49Easiest Way to Draw Anime Faces | ANIME FACE ANATOMY - YouTubeYouTubeStart of suggested clipEnd of suggested clipAcross draw a diagonal. Line then connect it to the chin. Using a curvy. Line for the jawline. SoMoreAcross draw a diagonal. Line then connect it to the chin. Using a curvy. Line for the jawline. So draw the eyes in the middle.
How do you draw a hairline?
4:0512:20How to Draw HAIR Tutorial 【 Basic Tips for Beginners】 - YouTubeYouTubeStart of suggested clipEnd of suggested clipBut it also Falls very flat or it falls very straight down from the forehead area so it's alwaysMoreBut it also Falls very flat or it falls very straight down from the forehead area so it's always just easier to start drawing. The hair from the the head or from the forehead area or the hairline.How to Draw HAIR Tutorial 【 Basic Tips for Beginners】 - YouTubehttps://www.youtube.com › watchhttps://www.youtube.com › watchSearch for: How do you draw a hairline?
What do anime hair colors mean?
Meaning, in most cases, the color of an anime character's hair does not reflect some natural hair color or a racial stereotype – instead, it is supposed to be a hint towards their personality and their role in the plot.Feb 4, 2015Anime Hair Colors: Do They Carry Any Significant Meaning In Japanese ...https://thoughtcatalog.com › martin-schneider › 2015/02https://thoughtcatalog.com › martin-schneider › 2015/02Search for: What do anime hair colors mean?
How do you make Naruto?
0:038:38How to Draw Naruto- Simple Video Lesson - YouTubeYouTubeStart of suggested clipEnd of suggested clipHey there today i'm going to show you how to draw naruto. So we'll start with the eyes as usual. SoMoreHey there today i'm going to show you how to draw naruto. So we'll start with the eyes as usual. So on the sides.How to Draw Naruto- Simple Video Lesson - YouTubehttps://www.youtube.com › watchhttps://www.youtube.com › watchSearch for: How do you make Naruto?
How to draw hair?
For the initial drawing of the actual hair you can start with the sides followed by the back. You can indicate the front section of the hair with just one line.
Why is anime hair drawn in clumps?
One good reason for this is that if you are drawing multiple frames of animation or multiple panels of a manga it will simply be too time consuming to draw anything overly detailed.
How to show the inner folds of the hair?
Erase the parts of the head hidden by the hair and add a few lines to show the inner folds of the front and back hair. You will generally want to position these folds in between the hair clumps as that is where these will usually tend to form in real hair.
How to tell if your hair is curly?
From the hairline draw two lines going towards the sides of the head to indicate the front hair. To show that the hair is curly you can draw these lines in light waves.
What is the hardest hairstyle to draw?
Anime curly hair drawing breakdown. Curly hair is probably the most challenging anime hairstyles to draw. This particular hairstyle can again be split into the front sides and back with the front hair being similar to the previous example. Anime curly hair step by step drawing.
What is the most common hairstyle in anime?
Long straight hair is probably one of the most common hairstyles in anime and is fairly easy to draw. Above you can see the breakdown of the long hair drawing example into: Red – Front Hair. Green – Side Hair. Blue – Back/Top Hair. You can apply a similar breakdown to drawing other hairstyles as well.
How many parts does anime hair have?
Anime neatly combed hair drawing. This hairstyle can again be split into three parts with the front, side and back hair. The front section of the hair however is a little different from the previous examples. Anime combed hair step by step drawing.
How to finish a hair drawing?
To finish the hair drawing you can add just one or two folds to the ponytail similar to the example. You can also lightly shade the hair.
How to draw a ponytail?
Draw the ponytail swinging in roughly the same direction as the hair clumps on the from section of the hair and make the splits on it’s end point in random directions.
What is a pigtail hairstyle?
The pigtails hairstyle will be very similar to the ponytail in the way that it’s drawn.
How to finish drawing a ponytail?
To finish the drawing you can again add a fold or two into the ponytail and then lightly shade the hair.
When drawing hair blowing in the wind, should the base of each section not move?
One important thing to note is that when drawing hair blowing in the wind the base of each section should not really move (sort of like it’s taped in place).
Where to start drawing a ponytail?
Unlike the previous examples you can start the ponytail hairstyle drawing with the back section of the hair.
Why is the lower back section of the hair not shown?
In this static view of the “long hair” most of it’s lower back section will not be shown because even if you were to draw out the full body it would be hidden behind the shoulders. As a result this example is not much different from the first hairstyle.
How to draw a manga girl's hair?
Step 1: Starting on the top, right side of the head (above the forehead), draw line that curves and then down all the way across the face and below the neck for the first part of the manga girl’s long hair . This line should come very close to the eye and at the bottom it should curve up slightly. Step 2: At the top, draw a curved, dome-like line ...
How to draw a wavy hairstyle?
Make the lines wavy and curve the up at the bottom. Keep the same length as the first side of the parted hair. At the bottom, draw a couple of curved, pointy tips for the ends of the hair. Step 5: At the top, draw a series of lines within the curvature of the previous hair chunks for the roots of the hair.
How to draw a hair clump?
To the right of the ear, draw another long, curved line that meets the first line at the bottom. The two lines should form a pointy tip at the bottom. Near the middle of this line, draw a thick clump of hair using a couple of curved lines. The line in step 1 and this line in step 2 should form a thick clump of hair that is parted from the middle ...
How to draw iris?
Use peach for the skin. Add a bit of pink to the cheek for blush. Use a bit of light brown on the skin next to the hair for shadows. Color the irises dark green at the top and gradually add light green at the bottom. Using two colors gives the iris a more rounded feel. For a simpler drawing, you can also just use a single color for the iris. You can also use any other color you’d like for the eyes. Don’t overlap the tiny highlight circles inside the eyes as you color the irises.
How to draw a hairstyle?
For every step, sketch lightly at first so that it’s easy to erase if you make a mistake. Step 1: Draw a big, curved, V-shaped line on the forehead, to the right of the eye and eyebrow for the first part of the hair.
How to color hair with highlights?
Using light brown, color a few streaks across the middle area of the entire hair for highlights. Use brown for the rest of the hair and don’t overlap the highlights. Use dark brown along the top and bottom of the hair. Color lightly at first and slowly blend the colors together.
Can you draw eyebrows over hair?
Don’t ink the parts of the ear that are behind the clumps of hair. If you’d like, you can draw the eyebrows over the hair like in the image or omit everything that is behind the hair. It all depends on personal style. Some manga artists draw the eyebrows over the hair because it’s a bit see-through and others don’t.
Popular Posts:
- 1. is the anime food wars on netflix
- 2. how to make anime cut out
- 3. how to watch anime on phone for free
- 4. where does komi can't communicate anime end in manga
- 5. who does uesugi fuutarou marry in the anime
- 6. which anime should i watch
- 7. are anime dakimakura pillow products good
- 8. is avatar considered anime
- 9. what is anime north
- 10. why is anime so popular all of a sudden