
How to Draw a Beautiful Anime Girl Step by Step
- Step 1 – Draw the Center Guide Line & The Top of the Head. ...
- Step 2 – Draw the Bottom of the Head. ...
- Step 3 – Draw the Neck/Shoulders. ...
- Step 4 – Position the Eyes Horizontally. ...
- Step 5 – Space the Eyes Horizontally & Draw Their Basic Outlines. ...
- Step 6 – Position & Draw the Eyebrows.
How to draw a face in a sandbox?
Step 2: Start outlining jaws and neck from the last 2 lines drawn in step 1. Step 3: Raise up the jawline drawing full face and ears on both side . Step 4: Draw 2 eyes below the diameter line marked or in the same line with ears. Mark a small line for the nose as in the image below.
How to draw a girl anime?
Here we are drawing a girl anime, for this, we need to draw the head, pelvic portion, broad shoulder with some static pose. Step 2: Firstly start drawing with basics, mark a horizontal line below the lower border of eyes. Same time draw a vertical line to divide the head into equal parts.
What is anime drawing?
Anime is computerized cartoons but you can draw them with a pen or pencil on paper. They have sparkling and rectangular eyes, spiked hair. They were produced in Japan and became so famous that are common in cartoon serials, comic books, and movies.
Is it hard to draw anime?
Anime manga is not so difficult to draw you only need to keep a few things in mind. By following our step-by-step manga anime girl drawing tutorial you can render your character. Use a pencil for drawing as it’s easy to erase and improve.
How to draw shoes anime?
Start by drawing some lines that indicate each item of clothing. Draw these lines in smooth curves that hug the shape of the body.
How to draw anime girl head?
Start by drawing the head without any of the small details. In the front view you can draw a circle to help you get the shape of the top of the head. In the side view it will be a slight oval. For more on drawing anime heads and faces see: How to Draw an Anime Girl’s Head and Face.
How long should an anime girl's legs be?
Anime girl leg structure. The legs should be about half the length of the entire body. The feet (when drawing the side view) should be about as long as the distance from the wrists to the elbow. For more on drawing the legs see: How to Draw Female Anime Legs Tutorial.
Why do you draw two views at once?
If you are drawing two views at once you can add the horizontal lines to make sure that the different body parts match up in both views. Drawing both views at once is a good exercise. If you are good at drawing one particular body part in one view but not so much in another this can help you.
How to draw anime girl eyes?
Start by sketching a curved upper eyelid, then draw a short line extending down from the outer corner of the eye. Leave the inner corner of the eye open for a softer look. Then, add a circle in the middle of the eye as the iris. Draw a smaller circle—the pupil—in the middle of the iris.
How to draw anime characters?
While artists have varying preferences about how to structure an anime character’s head and face, they all start with the same basic principle: First draw a circle, and then draw a horizontal line and vertical line directly ...
How long should an anime character's legs be?
The legs of an anime character should be approximately as long as the top half of the character, from the top of the head to the waist. Finally, add in the arms. A good rule of thumb is to align the elbow with the character’s waist, and then extend the rest of the arm (including the hand) to about mid-thigh.
How to make a reflection in the eye?
Leave the inner corner of the eye open for a softer look. Then, add a circle in the middle of the eye as the iris. Draw a smaller circle—the pupil—in the middle of the iris. To create primary and secondary light reflections, add in one or two additional circles within the iris.
What pen do you use to highlight a character?
While you will mostly ink with a black pen, it can also be helpful to have a white jelly pen on hand—you can use this to add highlights, like the reflection points in the character’s eyes. You may also choose to add additional colors with colored pencils or medium of your choice.
What is the difference between a character's nose and mouth?
The character’s nose and mouth will typically be much smaller and simpler than the eyes. The nose, for instance, may just be two small lines that represent the nostrils. Similarly, the mouth may be a simple curved line.
Step 1 – Draw The Overall Shape of The Female Body
One of the most important thing to keep in mind when drawing the full figure is the proportions or the relation of one body part to another. Everything has to be the right size or your character will look odd. Certain styles may deliberately exaggerate certain proportions (like the big anime eyes for example) there are still rules to fol…
Step 2 – Clean Up Your Drawing
- Clean up your drawing after you have established the basic shape of the body. You can also add in some of the smaller details such as the neck collar bones and the a hint of the knees in the front view. For more on drawing anime necks see: How to Draw Anime Neck & Shoulders
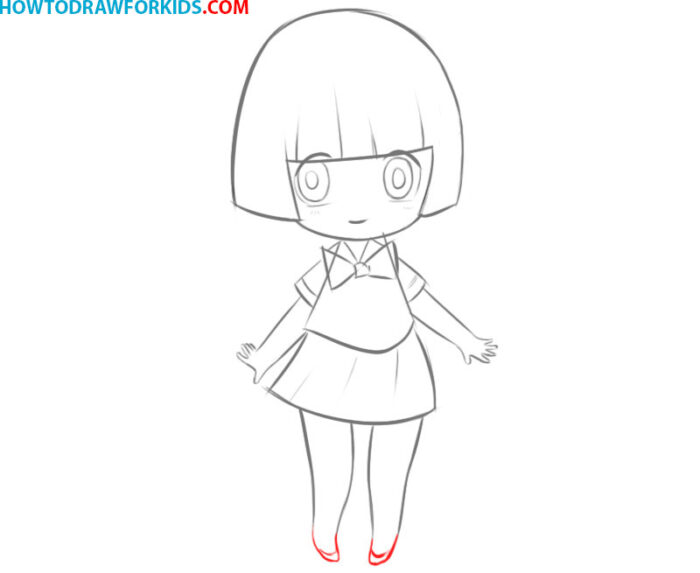
Step 3 – Draw The Details
- Drawn out draw in the details such as the hair and various facial features. We will not go into the details of drawing those in this tutorial as they are already covered in other tutorial on this website. You can refer to the following for more information: 1. How to Draw Female Anime Eyes Tutorial 2. How to Draw Anime & Manga Male & Female Hair 3. How to Draw Anime and Manga …
Step 4 – Draw The Clothes
- For the clothes we will draw a few basic items. We will draw a shirt, shorts and socks. If you would like to draw shoes see: How to Draw Anime Shoes Step by Step Since these type of clothes are fairly thin and tight it will follow the overall outline and shape of the body. Start by drawing some lines that indicate each item of clothing. Draw these lines in smooth curves that hug the shape o…
Step 5 – Add Color & Shading
- For the finishing touches add some basic color and shading. In this tutorial we will draw as if our character is standing in fairly normal lighting conditions either outside or indoors and facing towards the light source that is up above her. Any part of the body that is less exposed to light will be darker. In this case the you can add some as follows: 1. Neck/shoulder area 2. Inner parts of t…
Conclusion
- There is a lot keep track of when drawing a full body of an anime character. You have to make sure to have good proportions while still maintaining the style. Fortunately most common anime style bodies are still somewhat similar to real bodies so you can look at photos of real people if you need some reference material. For drawing a male anime and manga style characters see: 1…
Popular Posts:
- 1. how to find anime on demand
- 2. is yu gi oh a anime
- 3. a boy traveling anime
- 4. de andrè anime salve testo
- 5. are there any yaoi anime on netflex
- 6. a good anime movie on youtube
- 7. how to find the best anime for you
- 8. may 2016 anime loot crate
- 9. do you have an anime crush quiz
- 10. how many episodes in fairy tail anime