How to Shade an Anime Face in Different Lighting
- General Lighting Anime Face Shading. This shading option is usually suitable to most common lighting conditions where there is no particularly strong one directional light source.
- Side/Top Lit Anime Face Shading. When the light is coming from above and to one side of the character the shadows will be cast on an angle.
- Side Lit Anime Face Shading. When the light is coming directly from one side you will pretty much have an evenly split (down the middle) light and a dark side ...
- Bottom Lit Anime Face Shading
- Top Lit Anime Face Shading. Top lighting will basically be the reverse of the bottom lighting described above.
- Back Lit Anime Face Shading. Back lighting will pretty much create a sort of “outline” of light around the character. ...
- Conclusion. While Cel shading is fairly easy to apply as long as you have a general understanding of where to place the shadows.
Top Lit Anime Face Shading
Most of the face will be shaded with the lighter areas being placed as follows: Forehead – will be completely lit up as it curves towards the above light source. Nose – the upper side as it faces towards the light. Cheeks – the upper area of the cheekbones.How to shade for complete beginners?
Who this course is for:
- Complete beginners
- Students with some experience (but who need fundamental drawing skills to progress)
- Hobby Artists
- Students setting out on the journey to becoming an artist, illustrator or designer
- Crafters who want to go beyond pre-made designs
- Adults and Children (10+)
How to shade an anime face in different lighting?
Anime face shading different lighting Anime and manga generally use a technique known as “Cel” shading which is shading without gradients. Cel shading is generally much faster and easier to apply to a drawing than realistic shading which makes it great for shading quickly shading multiple frames of an animation or many panels of manga.
How to color skin anime?
Table of contents
- How do you add color to skin in Photoshop?
- What colors make anime skin color?
- How do I recolor skin in Photoshop?
- Is Adobe Photoshop good for drawing anime?
- How do you add skin color?
- How do I make all skins the same color in Photoshop?
- How can I change the color of my skin in a picture?
How to shade manga hair two ways?
How to apply transparent hair
- Apply gloss. Apply gloss with a hair gloss pen. ...
- Paint highlights. Create a new layer on the gloss you drew earlier. ...
- Apply gradation. Create a new layer on top of the undercoat layer. ...
- Fatigue. Lock transparent pixels. ...
- Finish. Since the color seems a little light, create a new hue correction layer to darken the color. ...
- Complete. It was completed. ...
How do you do shading in anime?
0:447:41Anime Shading Techniques: Manga Face - YouTubeYouTubeStart of suggested clipEnd of suggested clipSo under his jaw there's going to be another shadow and I'm going to follow the curve of the lineMoreSo under his jaw there's going to be another shadow and I'm going to follow the curve of the line above it his jaw.
What is the easiest way to shade?
1:0413:29How to Shade with PENCIL for BEGINNERS - YouTubeYouTubeStart of suggested clipEnd of suggested clipAnother way to practice is to draw a long rectangle and divide it into several squares fill theMoreAnother way to practice is to draw a long rectangle and divide it into several squares fill the squares from right to left start with the darkest.
How do you shade a shadow in anime?
The simple idea of how to add a shadow is to "attach to the opposite side of the direction in which light exists." If there is light on the left, it will be on the right, and if there is light on the top, it will be on the bottom. If you remember this much, I think it's good for now.
How do you shade correctly?
Darken the areas that are furthest from the light source. Press slightly harder with your pencil to make darker values on the opposite side of your light source. Build up layers of shading, working towards the darkest part of the drawing. Your darkest shadow is called the core shadow.
Why is shading so hard?
Shading can be really hard if you don't learn some basic skills. It doesn't have to though if you spend some time learning and practicing. First you need to understand that what we are really doing is trying to capture the shape of the thing you are drawing. We use the shading to do this.
What are the 4 types of shading?
The Four Types of Shading Techniques in ArtPencil Drawing Shading Techniques.Pen and Ink Shading Techniques.Paint Shading Techniques.The Basic Color Wheel.
What is anime shading called?
Anime-style or Cel Shading coloring is a style that mimics how traditional anime was animated. It applied simple shading without blending to make it easier to animate. To enhance this kind of coloring style, you can use other tools like gradients or effects.
How can I make my anime look like animated?
10:0114:56How to Make Anime EXPLAINED - YouTubeYouTubeStart of suggested clipEnd of suggested clipSometimes you can composite in video editing software like final cut but i recommend. After effects.MoreSometimes you can composite in video editing software like final cut but i recommend. After effects. This is where we take those animations. And really make them look like what you see in animation.
How do you shade a character?
12:5217:27Basic Lighting & Colour Theory - Tips on How to Shade - YouTubeYouTubeStart of suggested clipEnd of suggested clipAnd go to like a dark purple II blue color and say you want backlight lighting so just kind of colorMoreAnd go to like a dark purple II blue color and say you want backlight lighting so just kind of color over the character like this and then you want to erase away lower the opacity on the eraser.
Which pencil is best for shading?
While the softer B pencils are generally considered the best for shading, there's no reason to discount the harder H pencils. The HB and H are good choices for fine, light, even shading. However, they too have drawbacks. Pencil grades from HB through H, 2H to 5H get progressively harder and are easier to keep sharp.
Who is known for shading?
Gouraud shading, developed by Henri Gouraud in 1971, was one of the first shading techniques developed for 3D computer graphics....Flat vs. smooth shading.FlatSmoothLess computationally expensiveMore computationally expensive5 more rows
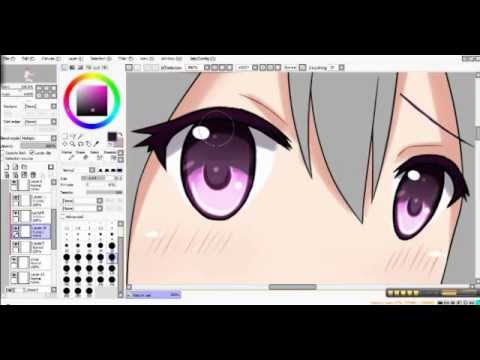
How do you shade eyes?
9:2651:01How to Draw Hyper Realistic Eyes | Step by Step - YouTubeYouTubeStart of suggested clipEnd of suggested clipSince i'm drawing with a mechanical pencil i need to thicken the lead by holding it at an angle andMoreSince i'm drawing with a mechanical pencil i need to thicken the lead by holding it at an angle and scribbling until the strokes become thicker. This will help you shade more smoothly.
Why do you need to add more detail to drawings?
Usually, the objects that are closer to the camera, have a lot more detail than the objects further back, and that’s because they don’t need to have that much detail , when everything in a drawing has the same level of detail, nothing stands out, so you only need to add more details to the parts that matter the most.
Do you need to color your eyes in Minecraft?
The eyes of the characters, however, tend to have more detail and colors depending on how close the camera is. Of course, you don’t need to use this method to color your character, since you can get the same result with different methods, I personally like to do it this way for 2 main reasons:
Can you animate a character?
Animating characters takes a lot of time, so anime studios use just clean lines and flat colors. Sure, you probably won’t animate your drawing, but if you want it to look like the real thing, you will need to draw as if it will be animated.
Can you use Clip Studio Paint on single image?
These are adjustments that usually, in animation, would be done with software for video editing, however, Clip Studio Paint has tools that can help you achieve a similar result when working in single images. First, to be safe, save every layer from your drawing in a single folder and then copy that folder.
What is anime shading?
You can shade the parts of the forehead hair tucked under the sides with very thin shadows along their bottoms and some fairly small shadows along the lines of the folds.
Where are the shading steps in anime?
Anime pigtails hair shading steps. At the sides and bottom ends of the clumps of the forehead hair. Along the sides of the head. At the bottom halves of the pigtails. Similar to the ponytail example the pigtails will tends to have a shadow cast on them by their upper part as they get narrower towards the bottom.
How is anime hair drawn?
How Anime Hair is Draw. Anime hair sections breakdown. Anime hair is generally drawn in large clumps with a lot of it based on real hairstyles. When drawing hair it can be helpful to break it down into the front, sides, and back/top sections as shown in the red, green and blue above.
Where are the short pigtails in anime?
Anime short pigtails hair shading steps. On the forehead area of the hair running along the sides and bottoms of of the clumps. Towards the bottoms of the side sections of the hair (again along the sides and bottoms of the hair clumps) Along the short pigtails as already described.
How to make your hair shiny in anime?
To make the hair look shiny add some highlights. You can draw these as a series of lines with some joined into small zigzags. Sometimes anime hair will be drawn with only one main highlight area but in this case we will add a highlight for each major part of the hairstyle (also common in anime and manga).
What happens if you draw shadows too dark?
If you make them too dark they will look unnatural and if you make them too light they may not be visible.
Where is the shadow on the neck?
Along the forehead hair clumps. Near the bottoms of the side hair sections. On the back section of the hair around the neck (large area) As already mentioned for the long hair shading example the large shadow around the neck will be created by that part of the hair being largely closed off from the light.
What is anime style coloring?
Anime-style or Cel Shading coloring is a style that mimics how traditional anime was animated. It applied simple shading without blending to make it easier to animate. To enhance this kind of coloring style, you can use other tools like gradients or effects.
What brushes can I use to color in Clip Studio?
There are also lots of other brushes you can use, such as airbrushes for simple gradients and decoration brushes for making patterns. Additionally, you can also download more brushes from Clip Studio Assets. Once you’ve finished your inking, use the pen tool and the fill tool to color.
What does "all layers" mean in Photoshop?
All layers: will refer to all layers on the canvas. Reference Layer: will only refer to the layer that you set as a reference. Selected Layer: will only refer to the layers currently selected. Layer in folder: will refer only to the layers in the current folder. Please use them as needed.
Can you use subview to draw character?
If you’re drawing a character from a reference image, you can use the subview to show the reference image and the color picker to make sure you are using the same colors as your reference. This is a very handy feature you can use instead of opening multiple reference images and switching through them.
What does it mean when you shade an object?
The object that you want to shade is illuminated from above, which means that it is light above and darker towards the bottom. Depending on whether the figure has a surface, it also casts a shadow on it. However, this light setting is rarely seen, as your figure then has to be directly below. From diagonally above:
How do hard and soft shadows work?
Now I'll explain to you what I mean by hard and soft shadows. Hard and soft shadows can arise depending on the light distance and the intensity. For example, global ambient light casts rather soft shadows because the light is not directed specifically at your figure, for example, like the light of the sun during the day outside in nature. However, if the light source is more focused and closer to the figure, harder shadows are created. This is also the case when two objects are next to each other and are illuminated. So the first object gets a rather soft shadow but throws a hard one on the second object as shown in the picture.
What color to use for skin tone?
For a skin-colored tone that is more between yellow and orange you can use a mixture of blue and purple. I like to weaken it a little in terms of color intensity in order to get a harmonious color transition.
1- Introduction
2- Brushes
- In this tutorial I will be using some brushes, but the ones that I use for almost everything tend to be just 3 or 4 of them, and here in particular, I will change between them depending on the element of the drawing. For example, to shade characters in anime, you usually only use hard brushes without texture, while for backgrounds you can use a wid...
3- The Sketch
- If you want to make it look authentic, I recommend to start by drawing the character with a background. In anime shows or movies, the characters are almost never just standing there with nothing in the background, they’re usually in a room, in the street, or at school, and as we will see soon, the way you shade the background is one of the main elements to consider if you’re going …
4- Lineart
- Now, if you want your drawing to look like something from an anime show or movie, you need to follow the same steps that are used to make anime, and that means, for starters, to have a clean lineart. When you’re working in a more painterly style, you might not need a clean lineart, or even a sketch, but that’s not the case here. Animating characters takes a lot of time, so anime studios u…
5- Coloring The Background
- For the coloring stage of the background, I don’t clean up the sketch. This may be different in some anime, but usually, backgrounds have no lineart, they tend to be a bit more realistic, so they don’t need it. So instead of cleaning up the sketch, I lower its opacity and start adding flat colors in a layer behind. Try to make it so that every object of the background has its own layer. For exam…
6- Coloring The Character
- Now we will color the character. First, in another layer, I will draw the lines that indicate where the shadows go. The color for these lines doesn’t matter, however, it’s a good idea to use very vibrant and saturated colors to make them look different from the lineart. Also, to avoid getting confused, you can use different colors depending on the parts of the characters, for example, red for the s…
7- Postproduction
- We’re almost done, now we just need to add the postproduction adjustments. These are adjustments that usually, in animation, would be done with software for video editing, however, Clip Studio Paint has tools that can help you achieve a similar result when working in single images. First, to be safe, save every layer from your drawing in a single folder and then copy tha…
8- Conclusion
- If I had to explain it with the least amount of words possible, it would be like this: “if you want your drawing to look like something from an anime show or movie, draw like they do and follow the same process” Obviously, there are differences since this is a single drawing and those are animations, but my point is that you need to imitate the process if you want it to look similar. Se…
9- Thank You
- I’m still kind of new to giving tutorials, so I hope I was able to explain it well enough. Also, English is not my first language, so if there are some grammatical errors feel free to tell me in the comments. Thank you for reading to the very end, I really hope this tutorial was of some help to you, if it did, feel free to give it a heart and leave a comment. Also, you can check out my stuff o…
Popular Posts:
- 1. what volume does the promised neverland anime end
- 2. did they ever make kaiji anime season 3
- 3. can i pick up badge at night anime expo
- 4. what dubbed anime does crunchyroll have
- 5. a-girl 1993 anime ost
- 6. a good romantic comedy anime
- 7. who should i draw anime
- 8. did levi die in attack on titan anime
- 9. how to draw an anime girl on ibispaint
- 10. how do animators make anime