
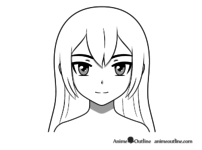
How to Shade an Anime Face in Different Lighting
- General Lighting Anime Face Shading. This shading option is usually suitable to most common lighting conditions where there is no particularly strong one directional light source.
- Side/Top Lit Anime Face Shading. When the light is coming from above and to one side of the character the shadows will be cast on an angle.
- Side Lit Anime Face Shading. When the light is coming directly from one side you will pretty much have an evenly split (down the middle) light and a dark side ...
- Bottom Lit Anime Face Shading
- Top Lit Anime Face Shading. Top lighting will basically be the reverse of the bottom lighting described above.
- Back Lit Anime Face Shading. Back lighting will pretty much create a sort of “outline” of light around the character. ...
- Conclusion. While Cel shading is fairly easy to apply as long as you have a general understanding of where to place the shadows.
Full Answer
How to blend anime skin tutorial?
Anime-Style Skin Coloring Tutorial In anime-style character illustrations, the way you paint the skin is important for bringing out your character's appeal! Use soft blush, highlights, and shadows to create a three-dimensional effect.
How to color skin anime?
Table of contents
- How do you add color to skin in Photoshop?
- What colors make anime skin color?
- How do I recolor skin in Photoshop?
- Is Adobe Photoshop good for drawing anime?
- How do you add skin color?
- How do I make all skins the same color in Photoshop?
- How can I change the color of my skin in a picture?
How to color anime skin using colored pencils?
How To Color Anime Clothes With Colored Pencils, colored pencils tutorial coloring using anime colors base magenta pencil dark basic pink clothe inner step, pencils colored coloring tutorial anime colors pencil using gold step basic base realistic amino things clothe outer adult layers yellow, anime colored pencils tutorial coloring using drawings eyes colors pencil blending texture colorless ...
How to color anime eyes?
Paint Manga Eyes in 6 Steps
- Importing line art. Let’s start by importing the image you just saved to the canvas of your drawing program. ...
- Create a base layer. When using the sample image or line art drawn with a digital pen, the line art will be drawn on a transparent film or ...
- Laying down base colors. ...
- Shade the iris. ...
- Adding lighter shades. ...
- Adding highlights and finishing touches. ...

How do you do anime face shading?
Top Lit Anime Face Shading Most of the face will be shaded with the lighter areas being placed as follows: Forehead – will be completely lit up as it curves towards the above light source. Nose – the upper side as it faces towards the light. Cheeks – the upper area of the cheekbones.
How do you shade in anime?
1:418:01EASIEST WAY TO SHADE ANIME - YouTubeYouTubeStart of suggested clipEnd of suggested clipCenter light and highlight. Form light is the direct opposite of form shadow form light occurs whenMoreCenter light and highlight. Form light is the direct opposite of form shadow form light occurs when the light source directly shines on the object. As for halftones.
How do you shade anime skins?
1:186:29How to Blend Anime Skin TUTORIAL - YouTubeYouTubeStart of suggested clipEnd of suggested clipSo if we're gonna pick a secondary color the first thing that we would do is to eye drop. And thenMoreSo if we're gonna pick a secondary color the first thing that we would do is to eye drop. And then we're gonna slide our hue all the way down here just a little bit to the left.
How do you draw an anime face shadow?
0:447:41Anime Shading Techniques: Manga Face - YouTubeYouTubeStart of suggested clipEnd of suggested clipSo under his jaw there's going to be another shadow and I'm going to follow the curve of the lineMoreSo under his jaw there's going to be another shadow and I'm going to follow the curve of the line above it his jaw.
What is anime shading called?
Cel Shading coloringAnime-style or Cel Shading coloring is a style that mimics how traditional anime was animated. It applied simple shading without blending to make it easier to animate. To enhance this kind of coloring style, you can use other tools like gradients or effects.
How do you do shading techniques?
Various shading techniques used to shade simple, geometric shapes....Hatching/Parallel Hatching. This can be considered the most basic of all of the shading techniques included here. ... Cross Hatching. Cross Hatching is like taking parallel hatching to the next level. ... Contour Hatching. ... Stippling. ... Tick Hatching. ... Woven Hatching.
How do you paint realistic anime skin?
2:478:54How to Draw Semi Realistic Anime: Portrait Process Explained in ...YouTubeStart of suggested clipEnd of suggested clipSo here's what i do i take my brush. Tool that has some opacity to it and do a stroke over myMoreSo here's what i do i take my brush. Tool that has some opacity to it and do a stroke over my background it mixes my skin color i picked with the background. And then i color pick that mix.
How do you shade a character?
2:1112:35How to Shade Characters With a Pencil [*4 ways] SIMPLE - YouTubeYouTubeStart of suggested clipEnd of suggested clipFor the shadow. Start with a thin light strip touching the bottom of her feet. Because the shadowsMoreFor the shadow. Start with a thin light strip touching the bottom of her feet. Because the shadows are on the right side of her body darkening to the right is accurate.
How can I color my lips?
2:3313:06How To Draw Lips | Colored Pencil Tutorial - YouTubeYouTubeStart of suggested clipEnd of suggested clipUse upward strokes as you don't want a messy. Look. Once you're done with that use the same red toMoreUse upward strokes as you don't want a messy. Look. Once you're done with that use the same red to darken up the line right below the middle part of the lip.
How do you do anime lighting?
7:1211:30HOW TO COLOR ANIME LIGHTING | Day and Night - YouTubeYouTubeStart of suggested clipEnd of suggested clipAlso coming in with a warm light it's like an extra light source. We've got to do this with anMoreAlso coming in with a warm light it's like an extra light source. We've got to do this with an airbrush. And this layer is kind of above. Everything it's even above the line art layer.
How can I draw better anime?
11 Tips To Get Better At Drawing Anime – Step By Step GuideGet Into A Drawing Routine.Learn Basic Anatomy.Learn To Draw In Perspective.Learn About Value (Light and Dark)Practice Mindfully.Learn From The Pros By Using References.Learn About Composition.Study Different Drawing Styles.More items...
Why do you need to add more detail to drawings?
Usually, the objects that are closer to the camera, have a lot more detail than the objects further back, and that’s because they don’t need to have that much detail , when everything in a drawing has the same level of detail, nothing stands out, so you only need to add more details to the parts that matter the most.
Do you need to color your eyes in Minecraft?
The eyes of the characters, however, tend to have more detail and colors depending on how close the camera is. Of course, you don’t need to use this method to color your character, since you can get the same result with different methods, I personally like to do it this way for 2 main reasons:
Can you animate a character?
Animating characters takes a lot of time, so anime studios use just clean lines and flat colors. Sure, you probably won’t animate your drawing, but if you want it to look like the real thing, you will need to draw as if it will be animated.
How to make a simple nose in anime?
If you want to make a simple nose, just put a dot on the point where the nose guide line and the vertical center line intersect.
How to draw a chin?
Place a horizontal mark for the chin underneath the circle. Find the distance from the center of the circle to the line you drew for the nose. Measure down from the bottom of the circle (or the nose line) to the distance you just found and make a small horizontal mark on the vertical center line.
How to make a female neck?
For a female character, place the lines for the neck closer to the chin so it’s narrower. Make straight vertical lines extending from the jaw on each side of the face to make the neck. Younger manga or anime characters will have a narrow neck since they aren’t as muscular or defined.
How to draw a sprite?
1. Place ears on the sides of the head between the eye and nose lines. The top and bottom of each ear will line up with the eye and nose lines you drew earlier. Sketch oblong C-shapes between the guide lines for your ears so they connect to the sides of the circle and jawline.
How to draw a jaw in a sandbox?
Outline the jaw for your character. Start on either the left or right side of the circle at its widest point. Draw a line from the side of the circle that’s slightly angled toward the vertical center line. Continue drawing the line until you reach the mark you made for the nose.
How to draw a boy's neck?
When you’re drawing a young boy or girl character, make the neck lines closer to the chin that the sides of the jaw. Hold your drawing out in front of you to see if the neck looks too long or short while you’re drawing it. Erase or extend the lines further depending on how it looks to you.
Popular Posts:
- 1. how to color anime with copic markers
- 2. could anime be real in another universe
- 3. how to understand anime without subtitles
- 4. how to make my face anime
- 5. which anime character do you kin uquiz
- 6. how to make an anime short film
- 7. is the fairy tail anime finished
- 8. how do you do anime song
- 9. do anime dubs edit the lip flaps
- 10. what anime is megumi from