
- Step 1: Add a rectangle and triangle (you will need to rotate the triangle, so it’s upside down)
- Step 2: Place the triangle at the end of the rectangle. They must be overlapping (just a notch).
- Step 3: Select both shapes and weld to create a new element for our stickers. (Weld is located at the bottom of the...
- Step 4: Rotate to fit your sticker layout
Full Answer
How do you make stickers with a Cricut?
Watch how easy it is to upload images to Cricut – then turn them into stickers! In Design Space click “upload image” and browse to find the image you’re using. Click around the background of the image to remove it. Select “save for print then cut” option and insert into project. Resize the image if needed.
How does the Cricut explore work with stickers?
The Cricut Explore finds the registration marks and then cuts around all the sticker designs. Unload the mat, and all your stickers are ready to use!
What is the size of the stickers in Cricut Design Space?
Since Cricut Design Space only allows us to Print then Cut in a size no bigger than 9.25 x 6.75in. I recommend you add a guideline so you are always aware of your space and can create a Sticker Sheet Layout.
What can I make with my Cricut?
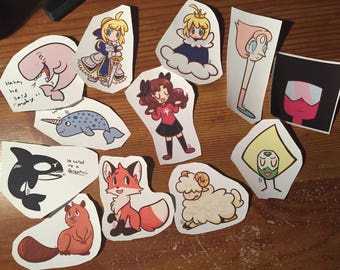
These stickers can be used as bumper stickers, car decals, water bottle decals, lunch box decals, or promotional stickers. It’s really crazy how popular stickers are- and how many sticker shops there are too! Stickers are my favorite thing about Back-to-School. And making stickers is my favorite way to use my Cricut.
How do you make your own Cricut stickers?
InstructionsStep 1: Create the image file. Download a premade sticker sheet image file. ... Step 2: Upload the sticker image to Cricut Design Space. First, open Cricut Design Space. ... Step 3: Print the image. ... Step 4: Set Materials. ... Step 5: Load the Mat. ... Step 6: Cut the stickers. ... Step 7: Unload the Mat and Remove the Stickers.
Can you make stickers with a Cricut?
6:0112:39How To Make Stickers With Cricut (SUPER QUICK + EASY) - YouTubeYouTubeStart of suggested clipEnd of suggested clipI have it too light cardstock for die cut stickers which means it's going to cut out the stickerMoreI have it too light cardstock for die cut stickers which means it's going to cut out the sticker paper as well as the backing. But if you want a kiss cut sticker which only cuts out the sticker paper
What supplies do I need to make stickers with my Cricut?
What you'll need:Cricut Maker or Cricut Explore machine.Printer.Printable sticker paper or printable vinyl (I used vinyl)Scissors or paper trimmer (optional, to trim down your sticker sheet)
Can you use Cricut vinyl to make stickers?
Some of the first projects every new Cricut owner should learn to make are vinyl stickers or decals. Luckily, learning how to make vinyl stickers with Cricut is very easy. We used this project in Cricut Design Space as our template and followed it step-by-step.
Which Cricut is best for stickers?
The Cricut Maker 3 is the ultimate cutting machine for making stickers. Not only does it do a fast job with traditional stickers, but if you're creating vinyl bumper stickers, you can get it done even faster. The top speed is 8 inches per second. And best of all, with vinyl bumper stickers, you don't need a mat.
What paper do you use for stickers on Cricut?
If you have a Cricut Maker, you can use colored paper (that's not too busy) and glossy white materials. If you have an Explore machine, you need to use white paper with matte finishes.
Is Cricut vinyl sticker waterproof?
Cricut printable vinyl is not only waterproof and tear resistant, but it can also be fully customized and compatible with Cricut, Silhouette Cameo and all other mechanical cutting machines on the market.
How do I waterproof my Cricut vinyl?
1:4331:21How to Make Waterproof Stickers on Cricut with Four Methods - YouTubeYouTubeStart of suggested clipEnd of suggested clipAnd lastly i used duraclear varnish to seal the stickers.MoreAnd lastly i used duraclear varnish to seal the stickers.
Does Cricut print color?
If you are using the Cricut Maker you can print on white or most other colors without any problems of picking up the registration marks.
How do I make Cricut stickers for beginners?
15:2418:02HOW TO MAKE PRINT THEN CUT STICKERS WITH CRICUT - YouTubeYouTubeStart of suggested clipEnd of suggested clipIt i like to use my brayer tool to press the sheet onto the mat i do this to try to prevent the inkMoreIt i like to use my brayer tool to press the sheet onto the mat i do this to try to prevent the ink from smudging. Then i load the mat into the cricut. Machine and it'll first read the blackHOW TO MAKE PRINT THEN CUT STICKERS WITH CRICUT - YouTubehttps://www.youtube.com › watchhttps://www.youtube.com › watchSearch for: How do I make Cricut stickers for beginners?
Can you print on regular Cricut vinyl?
Make colorful DIY vinyl decals with Cricut Printable Vinyl. The Print Then Cut feature in Design Space gives you endless possibilities using your home printer and Cricut machine to print and cut out images, patterns - even photos!Printable Vinyl: Cutting and Application Instructions - Cricut - Helphttps://help.cricut.com › en-us › articles › 360009430014...https://help.cricut.com › en-us › articles › 360009430014...Search for: Can you print on regular Cricut vinyl?
What's the difference between printable vinyl and sticker paper?
13:5329:22Printable Sticker paper and Printable Vinyl what is the difference which is ...YouTubeStart of suggested clipEnd of suggested clipFirst now with the clear sticker paper it is so glossy can you guys see how glossy that is what iMoreFirst now with the clear sticker paper it is so glossy can you guys see how glossy that is what i love is that my cricut can cut this glossy. Paper the vinyl is also super glossy.Printable Sticker paper and Printable Vinyl what is the difference which is ...https://www.youtube.com › watchhttps://www.youtube.com › watchSearch for: What's the difference between printable vinyl and sticker paper?
How big can you print stickers on a Cricut?
The first one is the size. You can only Print then Cut designs that are up to 9.25 x 6.75in. So check the size before you send your project to cut, or you will get a warning saying the image is too large.
How to add text to a cricut?
To add text, click on the Text button located on the left panel of the canvas. If you don’t know how to edit text in Cricut Design Space, make sure to read my tutorial on this topic. Once you are done adding colors and patterns to your stickers go ahead and type in the text you want to use.
How to upload a project to Cricut Design Space?
To upload your project, log in to Cricut Design Space, and click on to the Upload button located on the layers panel. Next, click on “Upload Image” and select it from your computer.
What size is a cricut design space?
Since Cricut Design Space only allows us to Print then Cut in a size no bigger than 9.25 x 6.75in. I recommend you add a guideline so you are always aware of your space and can create a Sticker Sheet Layout.
Calibrate Cricut Print then Cut
If this is your first time doing a print then cut project with your Cricut, you’ll want to calibrate the blade with the sensors reading the registration marks.
Upload image to Design Space
In Design Space click “upload image” and browse to find the image you’re using.
Printing stickers with a Cricut
Follow prompts to print the design. Toggle on the option for Bleed. This adds a bit of color around the outside of your image so that you don’t end up with a sliver of white around it after it’s cut. It will look a little fuzzy when it prints, but the cut looks correct.
Instructions
1. Find the image or images you want to turn into stickers (check Etsy, sites like Design Bundles) It should be a jpg or png
Recommended Products
As an Amazon Associate and member of other affiliate programs, I earn from qualifying purchases.
How to make a mat preview page?
Once everytihing looks good on your canvas click the Make it button in the top right corner of the screen. This will take you to the Mat Preview Page, which will show you your images positioned on a mat. There is a black line around your piece that wasn’t there before. This is the registration box. (It helps the machine sensors know where the boundaries of the design are on your page). Select Continue.
Can you use regular sticker paper in Cricut?
Cricut Sticker paper is cardstock-weight sticker paper and so the Sticker Paper setting in Cricut Design Space won't work for regular sticker paper. Use Premium Vinyl, Sticky Note, or Washi Tape settings instead.
Step 1
Click on the text box that says “name.” Another box should open. Click into that field and type your name. Center the text back on the polka dot design. If your notebook or journal isn’t 5” x 7” use the resize arrow on the bottom right of the images to adjust!
Step 2
Once your design is ready to cut, select everything and click “attach,” this will indicate to the machine that you want everything to cut exactly as it looks on the canvas.
Step 3
Click “Make it” in the upper right corner and follow the prompts on the software and machine through the cutting process.
Step 4
Apply transfer tape to the front of your design and apply to your notebook! Review this article on how-to apply transfer tape or go back to the video linked above to show you how-to apply vinyl stickers.

Popular Posts:
- 1. a silent voice manga vs anime
- 2. how to look like an anime character for guys
- 3. how to be a good anime drawer
- 4. how to watch monogatari series anime
- 5. how to change anime to english dub on crunchyroll
- 6. does viki have anime
- 7. is tokyo ghoul anime and manga different
- 8. a guy like you anime planet
- 9. would u rather anime
- 10. can i live stream anime on twitch