How do you draw anime art for beginners?
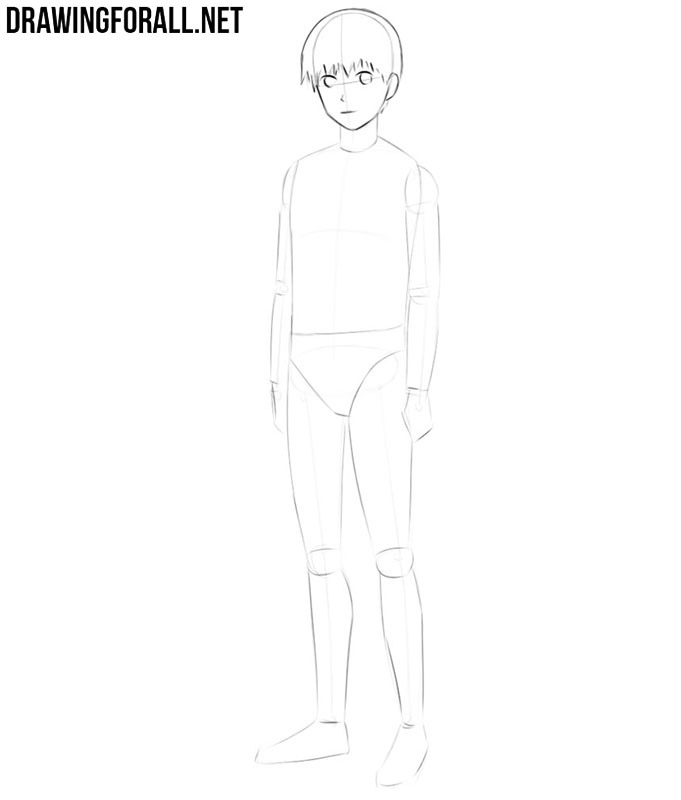
5 Simple Steps to Drawing AnimeStep 1: Create the Basic Structure of the Face. First, you will create the general composition of the character's face. ... Step 2: Add Facial Features. ... Step 3: Draw the Hair. ... Step 4: Add the Body. ... Step 5: Add Details and Ink the Drawing.
How can I draw myself in anime?
0:2718:08Drawing Myself into Three Anime Screen Captures! - YouTubeYouTubeStart of suggested clipEnd of suggested clipAnd to make you look as accurate as possible i'm going to trace over existing characters. I willMoreAnd to make you look as accurate as possible i'm going to trace over existing characters. I will draw over the character. And use other characters as references to draw.
Is Anime easy to draw?
At first, anime may seem like an easy drawing style, but it is not as easy as it looks; anime drawing is rather hard. Anime is hard to draw because it requires the artist to have proper knowledge about anatomy, perspective, value, and many other drawing fundamentals, which aren't easy to master.
How do you draw like a pro anime?
It's a good idea to portray the character in the act of doing something that most defines them.Sketch a Wireframe. ... Correct Proportions. ... Outline the Shapes to Create a Skin Layer. ... Draw Facial Proportions. ... Add Clothing, Decoration, and Hair. ... Tidy Your Outlines and Ink Your Drawing. ... Refine Shading and Color.More items...•
How do you make a real anime person?
Use personal photos or portraits from the Internet. As most anime characters have a common and distinct body structure, focus on making your drawing identifiable. Use accessories, scenery, pose, hairstyle, coloration and clothing to shape your character as an unique individual.
How do people turn into anime characters?
03A step-by-step breakdown of this process has been provided below (pictures included)Step 1Download the Snapchat App. ... Step 2Open Snapchat App on your mobile device. ... Step 3Search for the Anime Style Filter on Snapchat. ... Step 4Turn Yourself into an Animated Character. ... Step 5Upload your anime filter-ed video to TikTok.
Why is anime style so hard?
Yes, it is all done with simple lines and shapes, but it is done in a smart way that takes some time to understand. While other parts of anime character like the hair or chin may appear simple, some of the other parts are totally not, like the clothes, which tend to be more detailed, and in some cases, really detailed.
Why is drawing anime hair so hard?
Hair is a very complex subject to draw, because it's like a substance that can take many shapes and forms. Because of this, manga artists have developed a special method of simplifying hair.
Is making anime hard?
Making an anime is no simple task. It's an entire process of building and illustrating a world, finding motivations, weaving stories – this is a major undertaking! However, it's also a great exercise in creativity. If you're passionate about anime, you'll probably really enjoy making your own.
How do you make anime faces?
0:532:49Easiest Way to Draw Anime Faces | ANIME FACE ANATOMY - YouTubeYouTubeStart of suggested clipEnd of suggested clipAcross draw a diagonal. Line then connect it to the chin. Using a curvy. Line for the jawline. SoMoreAcross draw a diagonal. Line then connect it to the chin. Using a curvy. Line for the jawline. So draw the eyes in the middle.
How do you make Naruto?
0:038:38How to Draw Naruto- Simple Video Lesson - YouTubeYouTubeStart of suggested clipEnd of suggested clipHey there today i'm going to show you how to draw naruto. So we'll start with the eyes as usual. SoMoreHey there today i'm going to show you how to draw naruto. So we'll start with the eyes as usual. So on the sides.
What to add to anime drawing?
Add clothing to your anime drawing to give your character personality .
Who teaches you how to draw anime noses?
When you’re learning how to draw anime lips, eyebrows, or other specific facial features, it’s helpful to have focused instruction—and noses are no exception! In this course, Skillshare instructor Leon F. Andersen teaches you how to draw noses with varying degrees of detail .
What is the best thing about anime character design?
Though you may never have heard of a ninja skateboarder or a singing surfer, one of the best things about anime character design is that there are no rules! Feel free to combine different character types and styles to create a character that represents you and your interests.
Why is anime so popular?
Part of what makes anime so popular is that characters are known for having loud expressions and emotions. To help convey these sentiments through your anime character’s face, follow along as artist Enrique Plazola teaches you how to draw anime eyes in four different styles!
What is the best thing about digitizing anime?
One of the best things about digitizing your anime drawings is that you have limitless options for posing and positioning your characters. Character designer and animator McCoy Buck shows you how to do exactly that using digitized vector points for reference.
Why are proportions important in anime?
Anime drawing and character design is unique in that it allows for open-ended creativity while still remaining within standard design principles, like proportions.
How to take guesswork out of drawing hands?
Take the guesswork out of drawing hands by breaking them down into simpler, more familiar shapes.
How to draw anime head?
1. Draw an oval and divide it into 4 sections. This will be the basic outline of your anime character’s head. The proportions don’t have to be exact, but make the oval narrower at the bottom since that will be the chin. Once you’ve drawn the oval, draw a horizontal line through the center of it. Then, draw a vertical line through the center ...
How to draw a short hair character?
However, if your character’s hair is going to be short, draw a narrow oval on each side of the head. Have the top of the ears line up with the horizontal line running through the center of the face, and have the bottoms line up with the bottom of the nose. Then, draw the flaps of the ear inside each oval.
How to draw a torso in a cartoon?
For the torso, draw a quadrilateral (a 4-sided shape) that’s wider at the top and narrower at the bottom. Eventually, the wide corners at the top will become your character’s shoulders.
How to get a good manga?
Come up with a story first. Then, you'll need the ability to draw out that story. If you need any more help , you can go to any book store and find manga to give you a look on how a good story is written out. Or, borrow some manga from your library. Keep practicing, as it can take time to get all the pieces sorted.
How to draw hands well?
Community Answer. The best trick for drawing hands well is to study your own hands first. Notice the shape, color, texture, angles, etc. Draw your hand in dozens of different positions and in different lighting. This isn't a shortcut, per se, but it's an exercise that will improve your drawing.
How to draw a stick figure?
Make the hands about 1/5 the length of the arm, and make the feet about 1/6 the length of the legs. To get the proportions right, make your stick-figure outline about 7 times as tall as your character’s head. Have the arm lines start about 1/5 of the way down the line you draw for the torso.
How to see the nose in a drawing?
The nose will overlap with the vertical line you drew. To see it better, make it darker than the vertical line, or erase the vertical line around the nose.
What are the basic shapes of anime characters?
Drawing anime characters is fascinating and looks pretty hard—but, interestingly, all your favorite characters (from simple to extremely complicated) are born out of basic shapes like circles, squares, triangles, and so on.
Why is it important to give anime characters the right body structure?
However, giving them the right body structure enhances their personalities, and viewers can relate to them more as you convey the characters' thoughts and emotions through their physique.
What anime has the colors of the water tribe?
Ren Tsuruga and Shoutarou Fuwa in the anime Skip Beat! An exemplary use of colors is shown in Avatar: The Last Airbender, where the characters from different nations are shown with their respective colors. Water Tribe is shown in blue, Fire Nation has a red color, the Earth Kingdom is green, and Air Nomad is Yellow.
Why is shading important in drawing?
Shading is important—it gives your drawing a real-life look. It enhances the two-dimensional object and creates a sense of three-dimensionality. To perfect your shading skills, first look at how objects of different sizes and surfaces reflect light.
What does it mean to draw in perspective?
And perspective drawing is a method of enhancing the 2D object to give it a look of three-dimensionality. A great example is a cube, as shown above. Though all the sides are equal, they appear smaller from a distance.
How to use color effectively?
To use color effectively, you should be aware of simple theories like warm, cool, and complementary colors. Each color helps depict specific situations—for example, white is a symbol of peace. You can draw characters in white clothes if they are supposed to be plain and simplistic.
Is perspective drawing a subject?
Perspective drawing is a subject in itself. Before moving on, I suggest you learn every aspect of this technique. It takes time and effort, but it is extremely helpful.
How to draw a torso in anime?
Step 1 – Draw the Torso. Anime throwing pose torso drawing. Draw the torso almost horizontal to the ground with a slight backwards bend. It will also have a bit of a twist that you can show by making it wider at the top and narrower towards the the middle curving inwards on both ends but more so at the back.
What is an anime aiming pose?
Anime aiming pose drawing step by step. This pose is of a character aiming a gun. It can be common for a scenes like special forces storming a building. In this case the gun is a fairly large rifle but a similar pose can also work for a hand gun. You would simply need to change the position of the arms.
How to do a punching arm?
Draw the punching arm extended forward (hand in a fist) with the other arm pointing slightly backwards and it’s hand basically clenched to one side of the chest.
How to draw a forward facing arm?
Draw the forward facing arm bent so that it’s elbow points forward (sort of a reverse bent of the forward leg). The back facing arm in this case will be bit tricky as it’s bent backwards as the character is taking a swing. To show this bend draw the elbow to shoulder part of the arm slightly shorter and project it’s outlines to “cut” into the elbow to wrist part.
How to draw a character looking forward?
Draw the head tilted back (in relation to the torso) so that the character is pretty much looking forward.
How to draw a tucked in head?
Draw the head tilted forward and lower down (basically tucked in).
How to draw a leg?
Draw the legs with one being bent into a sort of forward facing arrow (helps emphasize motion) and the other straight at about the same angle as the body.

Popular Posts:
- 1. is the cowboy bebop anime on netflix
- 2. can i watch anime on my phone
- 3. how to draw cat ears anime
- 4. do meliodas and elizabeth get together in the anime
- 5. who made jojo anime
- 6. how to draw anime baby girl
- 7. where can you watch anime online websites for free
- 8. a harem in a fantasy world anime
- 9. a silent voice anime girl
- 10. what is the cutest anime