How to Draw Female Anime Eyes Tutorial.
- Step 1 – Draw the Outer Shape of the Eye. Female anime eye eyelids. Start the drawing with the outer shape of the eye. In this case the ...
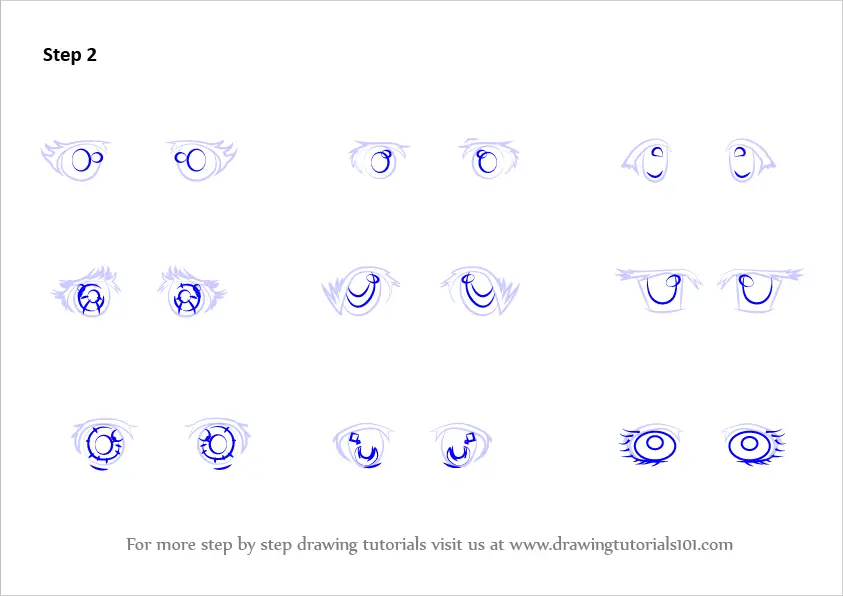
- Step 2 – Draw the Shape of the Iris.
- Step 3 – Draw the Pupil.
- Step 4 – Indicate Dark Area at Top of Iris.
- Step 5 – Draw the Primary Reflection.
How to Draw Female Anime Eyes Tutorial
- Step 1 – Draw the Outer Shape of the Eye. ...
- Step 2 – Draw the Shape of the Iris. ...
- Step 3 – Draw the Pupil. ...
- Step 4 – Indicate Dark Area at Top of Iris. ...
- Step 5 – Draw the Primary Reflection. ...
- Step 6 – Draw the Secondary Reflection. ...
- Step 7 – Shade The Different Area of the Eye.
How to draw anime girl Eyes for beginners?
Method 3 of 4: Drawing Female Anime Eyes
- Draw the upper and lower lash lines. First, draw a downward curving line for the upper lash line. ...
- Sketch an oval between the lash lines. Make the top and bottom of the oval overlap with the lash lines so the top and bottom are hidden.
- Draw a small circle near the top of the oval. ...
- Add a smaller circle near the bottom of the oval on the opposite side. ...
How to draw anime for beginners?
Beginner Guide to Drawing Anime & Manga
- Make Light Line Drawings First. Draw using light lines first and then trace over them with darker lines once you are sure that everything is in the right place.
- Use Guide/Construction Lines. Use guide lines to help yourself draw. ...
- Plan Out Your Drawing & Draw Larger to Smaller. Estimate your proportions before you start drawing. ...
- Keep Different Parts of Your Drawing in the Same Stages of Completion. Try and keep the various objects in your drawing in roughly the same state of completion. ...
- Draw Things That Are Hidden. It’s sometimes a good idea to draw things that are hidden by something else. ...
- Do Drawing Exercises. As a beginner artist you can really benefit from some fairly simple exercises of drawing lines and basic geometric shapes.
- Study the Anime Style. To make art that looks like anime and manga you have to understand their defining characteristics. ...
- Check for Mistakes. If you are having trouble spotting your mistakes turn your drawing upside down or hold it up to a mirror.
How to draw different types of anime eyes?
For a serious looking anime character you can draw the eyes vertically narrower with the top eyelids and eyebrows lowering down towards the middle of the face. If you want a character have crazy or scared looking eyes draw them wide open with small irises and small pupils. Leave white space between the irises and the eyelids/eyelashes.
How to draw angry anime eyes?
Method 4 of 4: Drawing Different Eye Expressions Download Article
- Narrow the eyes and curve the lower eyelids down to show sadness. ...
- Widen the eyes to create a look of surprise. Draw the upper eyelids higher and the lower eyelids lower than normal so there are gaps between both the tops ...
- Slope the upper eyelids down to create an angry expression. ...
- Draw the eyes closed to show happiness. To draw the eyes closed, just draw the upper eyelids like you normally would—a downward curving line for female anime eyes or ...

How do you draw a simple anime girl?
0:006:19So we're gonna start with a basic shape of the face as you see the chin is well off to the sideMoreSo we're gonna start with a basic shape of the face as you see the chin is well off to the side rather than straight down because she's in a 3/4 view and and to show that here is the center line okay.
How do you draw anime girls eyes Wikihow?
Draw an oval between the two lines to make the iris. Now add a small circle near the top left part of the oval so the eye looks like it's reflecting light. Make a smaller circle on the bottom right part of the oval. Next, draw a small oval inside of the iris and fill it in to make the pupil.
How do you do anime style eyes?
Draw the upper and lower lash lines. Then, make the upper lash line thick and bold with your pencil. For the lower lash line, draw a short, upward curving line centered under the first lash line you drew. Female anime eyes are usually bigger and rounder than male anime eyes.
How do you draw beautiful eyes step by step?
How to draw a realistic eyeStep 1: Outline the Shape of an Eye and Highlight. Let's start off with an HB pencil to sketch the shape of the eye. ... Step 2: Shade the Pupil. ... Step 3: Shade the Iris. ... Step 4: Draw Spokes. ... Step 5: Blend the Iris. ... Step 6: Add Depth. ... Step 7: Shade the Skin. ... Step 8: Draw Eyebrows and Eyelashes.More items...•
How do you make anime tears?
When you are drawing an anime character that is staring to cry draw the eyes squinted. Draw the bottom eyelashes/eyelids curved inwards and slightly lowered towards the outer part of the eye. Draw the top eyelashes/eyelids less curved than normal and also slightly lowered towards the outer part of the eye.
How do you do Ibispaint eyes?
1:206:17Like this add a new layer and turn clicking again click blue and choose multiply use space color toMoreLike this add a new layer and turn clicking again click blue and choose multiply use space color to draw to. Hold you can reposition it or use tool to make it rounder use the brighter.
How do you draw a girl cartoon eye?
2:0817:56I can put a little line here to indicate the eyelid. I often put a little line down there a littleMoreI can put a little line here to indicate the eyelid. I often put a little line down there a little line here and then I draw in the the iris and actually.
How do you make an anime smile?
2:3138:54This will be doing the same sort of thing but just a little bit wider. And sweeping down to theMoreThis will be doing the same sort of thing but just a little bit wider. And sweeping down to the outside edge a bit more. And then i'm just going to come down. Here bring in that shape.
How do you draw eyes easily?
2:1910:04Take a softer pencil. And line out the iris. And then draw lines all the way around the pupil likeMoreTake a softer pencil. And line out the iris. And then draw lines all the way around the pupil like that move the pencil very softly over the paper.
How do you make a cartoon eye?
0:4014:36So here's a really quick easy basic way to draw great eyes straight away so I'm gonna show you aMoreSo here's a really quick easy basic way to draw great eyes straight away so I'm gonna show you a really quick trick what I like to do when I'm drawing cartoon eyes I want to draw two.
How do you draw a person's eyes?
5:128:14Sometimes kids will create an eye. That looks like this and then they put their iris floating. RightMoreSometimes kids will create an eye. That looks like this and then they put their iris floating. Right in the middle. And then a pupil right inside and it looks like a really shocked cartoon eye.
How do you paint realistic eyes?
4:1311:34I also gently blend that cornea color with the colors i placed in the corner of the eye. And toMoreI also gently blend that cornea color with the colors i placed in the corner of the eye. And to create the deeper fold in the eyelid i mixed mars black with burnt sienna and alizarin.
How do you make an anime smile?
2:3138:54This will be doing the same sort of thing but just a little bit wider. And sweeping down to theMoreThis will be doing the same sort of thing but just a little bit wider. And sweeping down to the outside edge a bit more. And then i'm just going to come down. Here bring in that shape.
How do you draw a cartoon girl crying?
3:0211:33But very crucial for this crying character is to get the curves of the eye brows and watch how I doMoreBut very crucial for this crying character is to get the curves of the eye brows and watch how I do this one it's curving across like this and it sort of zigzags.
How do you draw eyes easily?
2:1910:04Take a softer pencil. And line out the iris. And then draw lines all the way around the pupil likeMoreTake a softer pencil. And line out the iris. And then draw lines all the way around the pupil like that move the pencil very softly over the paper.
How do you draw a cartoon crying face?
0:2126:51Now we just want to look at the entire subtle shift in different kind of levels of sadness you getMoreNow we just want to look at the entire subtle shift in different kind of levels of sadness you get just from the eyes tearing up all the way to those crying kind of features.
How do you draw anime eyes from the side?
Place the top lash-line about halfway between the top and bottom of the head. The upper and lower lash lines should form a roughly triangular shape...
How do you draw anime eyes crying?
Peak the eyebrows in the middle to give the eyes a sad look. If you like, you can draw a small crease next to the inner end of each eyebrow for a l...
Why is anime called anime?
Anime is a shortened form of the English word “animation.” The term anime is used in Japan to distinguish animated cartoons from illustrated cartoo...
How to draw a C shaped eyeliner?
First, draw a downward curving line for the upper lash line. Add a curved tail at one end (draw it on the end that's going to be the outer corner of the eye), going down and back toward the other end of the line, so the upper lash line is C-shaped.
How to make an oval eye?
Make the top and bottom of the oval overlap with the lash lines so the top and bottom are hidden. Make the width at the widest part of the oval the same as the length of the lower lash line. This will be the iris of the eye. ...
How to draw a bigger pupil?
Variation: You can draw a bigger pupil if you want the eye to look bigger and wider. Just make the oval about 1/2 the size of the iris (instead of 1/4th) and overlap it with both of the small circles you drew before. The circles should be in front of the oval. ...
What are the features of anime?
Learn more... One of the most recognizable features of anime is the eyes. They’re big, they’re expressive, and they’re often exaggerated to show emotion. Anime eyes are only made up of a few basic shapes and they don’t have a lot of detail, so they’re actually pretty simple to draw.
How to draw a simple iris?
Step 1 - Sketch the basic eye shape. Draw the basic shape of your iris, which is a circle or slight oval! Keep your pencil pressure relatively light in case of mistakes.
How to make your character look sleepy?
Eyelids can be used to make your character look sleepy, alert, or neutral. Although a subtle detail, it adds depth to the eye . Note how the eyelid is slightly further from the lash line near the outer corner of the eye, and closer near the inner corner. Also notice how the line is darker and thicker near the outer corner.
Where to draw a curved line?
Draw a curved line on the top and bottom of your circle. Note that the top lash line is longer than the bottom, and has a more severe curve near the inner corner of the eye.
How to draw anime eyes?
To draw serious anime eyes, first draw a horizontal line with a slight curve. Draw a short line coming down off of one end at a 45-degree angle to finish the top of the eye. Then, draw a short horizontal line centered under the first line to make the bottom of the eye. Draw an oval between the two lines to make the iris.
How to make an anime character open their eyes wide?
Widen the eyes to create a look of surprise. Draw the upper eyelids higher and the lower eyelids lower than normal so there are gaps between both the tops and bottoms of the pupils and the eyelids. This will make it look like your anime character is opening their eyes wide in shock.
How to draw a light source?
If you want the light source to be on the left in your drawing, draw the big circle on the left side of the iris and the small circle on the right. If the light is on the right, swap the circles. For lighting that’s above the eye, draw the big circle at the top of the iris and the small circle at the bottom.
How to draw a sprite?
Draw a downward curving line for the upper eyelid. Make the length of the line as wide as you want the eye to be. Make the line thick near the middle, and then have it get gradually thinner the closer it gets to the ends. 2. Sketch a horizontal line that curves up at the ends for the lower eyelid.
Where should the circles go in the iris?
If the light is to the left of the eye, draw the big circle on the left side of the iris and the small circle on the right. If the light is to the right, do the opposite.
Do anime characters have colorful eyes?
Community Answer. In anime, characters often have colorful eyes depending on the art style. If you want to draw in a specific art style (eg: Black Butler), then pay attention to how dark or light the eyes are and how many highlights you should add.
How to draw sad eyes?
For a sad look draw the eyes squinted. Draw the bottom eyelids in a slight upside down arch. Draw the outer edges of the eyebrows lower down with less of an arch than normal or even in an upside down arch.
How to draw eyebrows?
For a normal expression draw the iris slightly covered by the top eyelid while just touching the bottom eyelid. Draw the eyebrows slightly above the eyes in a smooth curve. When drawing different expressions the eyebrow shape and positions and the positions of the pupils can be different. For drawing different kinds of eyebrows see: ...
How to draw an angry look?
For an angry look draw the eyebrows down in a kind of inward wave shape. Draw the top eyelids down in an inward slope and draw the pupils slightly rolled up.
How to draw a surprised look?
For a surprised look draw the eyes wide open with the eyebrows raised. The wider you draw the eyes and the farther you raise the eyebrows the more surprised the character will look.
Where are the anime eyes located?
Placing Anime or Manga Eyes on the Head. Real eyes are located in the middle of the head. Anime eyes are often draw much farther down the head. A good guide for drawing anime eyes is to draw a horizontal line through the middle of the head as shown in the above example and to draw the eyes below that.
Where to draw pupil reflections?
Draw the pupil in the middle of the iris. The positions of the reflections will depend on the the position of the viewer. There can be more than one reflection depending on how many light sources there are. In this case we have two. One for the main light source and one from a secondary light source.
What is the difference between realistic and realistic eye expressions?
One major difference between drawing realistic eye expressions is that in anime and manga the size of the pupil can be changed to create a more dramatic expression (really scared eye expression for example). Below is a breakdown of each expression.
What does it mean to draw anime eyes?
A basic understanding of the anatomy of the eye. Knowing common elements that make most eyes look like anime eyes. A step-by-step approach to drawing anime eyes while implementing these common elements. A quick note, before going further, I will use the term anime to mean both anime and manga for simplicity.
What is the degree of realism in anime?
Degrees of realism and stylization. In anime and manga, eyes are drawn in various degrees of stylization. Human anatomy in anime is stylized often to the point of being unrealistic, yet still very recognizable as the anime counterpart of the real world person the artwork is describing. This is an important point.
What is the drop shadow on the upper eyelid?
A drop shadow from the upper eyelid covers the iris and the sclera one third or sometimes half of the way down. (Confused about what iris and sclera are? Scroll up to the anatomy section of this article, or click here to be taken there).
What is the upper eyelid crease?
Upper eyelid crease. – The upper eyelid crease is a horizontal indent formed above the upper eyelid that appears in some people. Notably, it is prominently indicated in most anime eye drawings, and stylized into a curved line. It helps situate the anime eye drawing so it is a good idea to take notice of it.
What is the iris in the eye?
– the iris is a ring shaped membrane, with an adjustable circular opening (pupil) in the center. The iris is what people talk about when they talk about eye color. (Some people confuse it with the pupil, so here is a tip to remember it better: eye color = iris color)
What are highlights in anime?
Highlights from at least 2 light sources. White or bright circles or ovals appearing in stylized anime eyes are representative of highlights on the surface of the eye. Note here that usually one highlight is dominant and is depicted larger, and the second subordinate and depicted smaller.
What is the stylizer called in anime?
Fortunately, we all have a stylizer machine called the brain! In anime, there is a spectrum of on one end, very large anime looking eyes, and some on the other end, that are pretty realistic with some stylization flare. I tend to like something in the middle, although a lot depends on the artwork itself.
How to draw anime girl eyes?
Start by sketching a curved upper eyelid, then draw a short line extending down from the outer corner of the eye. Leave the inner corner of the eye open for a softer look. Then, add a circle in the middle of the eye as the iris. Draw a smaller circle—the pupil—in the middle of the iris.
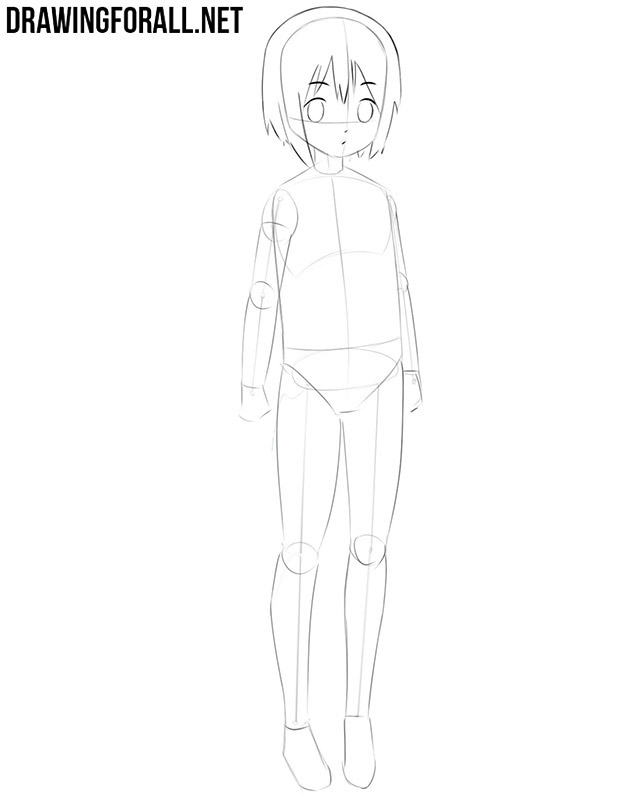
How to draw anime characters?
While artists have varying preferences about how to structure an anime character’s head and face, they all start with the same basic principle: First draw a circle, and then draw a horizontal line and vertical line directly ...
How long should an anime character's legs be?
The legs of an anime character should be approximately as long as the top half of the character, from the top of the head to the waist. Finally, add in the arms. A good rule of thumb is to align the elbow with the character’s waist, and then extend the rest of the arm (including the hand) to about mid-thigh.
How to make a reflection in the eye?
Leave the inner corner of the eye open for a softer look. Then, add a circle in the middle of the eye as the iris. Draw a smaller circle—the pupil—in the middle of the iris. To create primary and secondary light reflections, add in one or two additional circles within the iris.
What pen do you use to highlight a character?
While you will mostly ink with a black pen, it can also be helpful to have a white jelly pen on hand—you can use this to add highlights, like the reflection points in the character’s eyes. You may also choose to add additional colors with colored pencils or medium of your choice.
Popular Posts:
- 1. what is the strongest anime character in history
- 2. how to draw anime features
- 3. can we go to anime world
- 4. which anime character are you test
- 5. is assassination classroom anime finished
- 6. is food wars anime completed
- 7. can study anime
- 8. can you feel my heart anime lyric
- 9. is aot anime different from manga
- 10. how do anime studios animate