
A “striped” anime blush is made with just a few line strokes and is fairly easy to draw. Simply make two sets of angled lines around the cheek areas. For a nicer looking blush make the outer stripes a bit shorter and the inner stripes a bit longer. Aim for a combined shape that can fit inside a stretched oval.
Full Answer
How to draw anime for beginners?
Beginner Guide to Drawing Anime & Manga
- Make Light Line Drawings First. Draw using light lines first and then trace over them with darker lines once you are sure that everything is in the right place.
- Use Guide/Construction Lines. Use guide lines to help yourself draw. ...
- Plan Out Your Drawing & Draw Larger to Smaller. Estimate your proportions before you start drawing. ...
- Keep Different Parts of Your Drawing in the Same Stages of Completion. Try and keep the various objects in your drawing in roughly the same state of completion. ...
- Draw Things That Are Hidden. It’s sometimes a good idea to draw things that are hidden by something else. ...
- Do Drawing Exercises. As a beginner artist you can really benefit from some fairly simple exercises of drawing lines and basic geometric shapes.
- Study the Anime Style. To make art that looks like anime and manga you have to understand their defining characteristics. ...
- Check for Mistakes. If you are having trouble spotting your mistakes turn your drawing upside down or hold it up to a mirror.
What are the steps to drawing anime?
The shape of the lower part of the face is as follows:
- Two downwards lines slightly angled inwards (towards middle of face)
- A pair of light curves
- Two more downwards lines that face more inwards than previous pair
- Small curve for the chin
How to draw anime step by step?
How to Draw an Anime Character Drawing Close Up
- Sketch a big circle.
- Sketch the face, neck and the shoulder.
- Add the guidelines for the face.
- Draw the basic outline of the face and the ears.
- Add the eyes, nose, and mouth.
- ... (more items)
How to draw a beautiful anime girl step by step?
How to Draw a Beautiful Anime Girl Step by Step.
- Step 1 – Draw the Center Guide Line & The Top of the Head. Beautiful anime girl head top drawing. Star by drawing a vertical line through the middle ...
- Step 2 – Draw the Bottom of the Head.
- Step 3 – Draw the Neck/Shoulders.
- Step 4 – Position the Eyes Horizontally.
- Step 5 – Space the Eyes Horizontally & Draw Their Basic Outlines.
How to draw blush anime?
What does a blush mean in anime?
What are the different types of blush?
How to make blush with angled lines?
How to draw a striped blush?
Is blushing appropriate for a more emotional face?
Is Blush a good anime?
See more
How do anime girls blush?
0:374:55Anime Blush (3 Ways) - YouTubeYouTubeStart of suggested clipEnd of suggested clipDirection you don't want them both to point inwards or point outwards you want to keep them goingMoreDirection you don't want them both to point inwards or point outwards you want to keep them going the same way. And look you're done just that.
How do you make blush art?
1:554:46How to BLUSH in Photoshop - YouTubeYouTubeStart of suggested clipEnd of suggested clipSize down. And we'll work on some here on the corners. Here we're going to make her really blushy.MoreSize down. And we'll work on some here on the corners. Here we're going to make her really blushy.
How do you make anime blush?
A “striped” anime blush is made with just a few line strokes and is fairly easy to draw. Simply make two sets of angled lines around the cheek areas. For a nicer looking blush make the outer stripes a bit shorter and the inner stripes a bit longer. Aim for a combined shape that can fit inside a stretched oval.
What is anime blush?
In manga and anime, diagonal lines drawn across a character's face, over their cheeks, nose, and sometimes ears, symbolize blushing, and are used when the character is embarrassed, flustered, or any other time they're red-faced. In color, the blushing lines are normally drawn red.
How do you color anime?
The coloring style used in anime is known as “Cel Shading”....How to Color an Anime Character Step by StepStep 1 – Outline Drawing. ... Step 2 – Black Areas. ... Step 3 – Body Color. ... Step 4 – Clothes Color. ... Step 5 – Hair Color. ... Step 6 – Eye Color.More items...
How do you shade anime?
Top Lit Anime Face Shading Most of the face will be shaded with the lighter areas being placed as follows: Forehead – will be completely lit up as it curves towards the above light source. Nose – the upper side as it faces towards the light. Cheeks – the upper area of the cheekbones.
How do you make an anime smile?
2:3138:54HOW TO DRAW SMILING HAPPY EXPRESSIONS (Real Time)YouTubeStart of suggested clipEnd of suggested clipThis will be doing the same sort of thing but just a little bit wider. And sweeping down to theMoreThis will be doing the same sort of thing but just a little bit wider. And sweeping down to the outside edge a bit more. And then i'm just going to come down. Here bring in that shape.
What is drunk blush?
One trend that continues to gain speed is Igari makeup. It's sometimes called “drunk blush” or “hangover makeup.” That's because the finished vibe resembles the flushed look when someone has had a bit to drink.
What emotion causes blushing?
Blushing is the reddening of a person's face due to psychological reasons. It is normally involuntary and triggered by emotional stress associated with passion, embarrassment, shyness, fear, anger, or romantic stimulation.
Why do anime characters blush drunk?
Then I found out that 30% to 50% of people of Chinese and Japanese ancestry lack the enzymes to properly metabolize alcohol, because of this, Flushing or blushing, occurs on the face, neck, shoulder, and in some cases, the entire body after consumption of alcohol.
Why do anime characters have swirls on their fingers?
In anime, sometimes a spiral is drawn on a character's finger tip, typically on their index finger, when they point the finger toward the camera. This doesn't mean anything. It's just a simple way to draw the "fingerprint," shimon 指紋, of the finger. Swirling fingerprint.
Where do you put blush on a drawing?
0:422:47How I ADD BLUSH with ALCOHOL MARKERS | Mini Tutorial | iiKiuiYouTubeStart of suggested clipEnd of suggested clipUsually this is under the outer corners of the eyes for me then apply the lighter color underneathMoreUsually this is under the outer corners of the eyes for me then apply the lighter color underneath trying to blend it. If you're using a brush pen use feather like strokes near the outside.
What does Blush do?
Blush makes your drawings look softer and cuter. You can add it on any part of the body depending on your style!
What color should I use for blush?
Pick the color. For blush, I like using light reddish tones.
What is the most important part of drawing?
Coloring skin is one of the most important parts in a drawing! It can be very hard sometimes, especially if you can’t choose the right colors and tools for it! That’s why I decided to make a small tutorial showing how I color skin using Clip Studio Paint. I hope you enjoy the tutorial and find it helpful!
Why should the base color be brighter than the final skin tone?
The base color should be brighter than the final skin tone that you want to have. This is because we will add darker shading later!
How to make your eyes look soft?
Under the nose. On the lips: I like coloring the lips darker from the middle and brighter toward the edges, this will make the lips look very soft.
What color should I use for highlights?
Pick the color. For highlights, I personally just use a whitish color for this type of skin tone! For darker skin, white will look very bright, so I would go with light pink or brown tones instead.
Why do we add highlights to drawings?
If your drawing has shadows, that means there is a light too! That’s why we add highlights, which gives the skin a soft glow!
What tool do you use to draw anime?
If you want more of a hand-drawn look, it’s best to use a pencil tool. But if you want it to be sharp like in anime, the G-Pen will help you achieve that effect.
What is anime style coloring?
Anime-style or Cel Shading coloring is a style that mimics how traditional anime was animated. It applied simple shading without blending to make it easier to animate. To enhance this kind of coloring style, you can use other tools like gradients or effects.
How to soften a Gaussian blur?
By applying Gaussian blur on the top layer (spend some time playing with the settings to find the right level for your illustration) and decreasing the opacity by about 20 – 40%, you can soften the illustration even more.
What type of layer do you use for line art?
For the line art, let’s use a vector layer. Vector layers are different from raster layers. See this article for a good explanation about how they’re different: https://tips.clip-studio.com/en-us/articles/600 You can use whatever pen, pencil, or brush you like to do line art. This time I used the G-pen and Real Pencil.
What does "all layers" mean in art?
All layers: will refer to all layers on the canvas.
When you add a background, do you need to adjust the color?
Instead of recoloring the whole background, you can make use of Correction Layers.
Can you have too many layers in anime?
Anime-style coloring is not complicated. So you shouldn’t have too many layers. Even so, it’s a good idea to keep your layers organized and named so they’re easy to find. Since you’re not juggling too many layers, and you’ll just be blocking in color, you can use the selection tool to easily select any areas you want to adjust. If you want to make a work with more detail, you can always create more layers later. Today, however, we are going to take it easy.
What are the main features of anime?
There is a very specific set of anime defining features. Some of these include: 1 Big eyes with thick pointy eyelashes 2 Highly simplified nose (often just a dot in front view) 3 Small mouth (usually with no or barely defined lips) 4 Small almost pointy chins
When drawing the same character in different views, what should you do?
When drawing the same character in different views check carefully to make sure that the different facial features keep the same size and alignment in relation to one another.
What is the common mistake that beginners make when drawing?
Making a drawing that is too small (or too large) for the drawing area is yet another common mistake many beginners make.
What is the most common mistake in coloring?
One common coloring mistake is picking colors that blend with one another or blend with the black outlines of a character or an object. If you want to use darker colors make sure the outlines of the drawing are not lost when you apply it. Draw white or light color outlines for that part of the drawing.
Why are my anime lines so thin?
In anime the lines are generally fairly thin in relation to the characters with no line weight variation. Manga on the other hand are more likely to have drawings with varying line thickness.
Why are drawings with no perspective so odd?
Drawings with no perspective simply look odd. Generally even people who are not artists can tell somethings is off about them though they may not always be sure what it is. When it comes to anime and manga perspective is especially important for background objects or for getting more dramatic looking scenes.
How to avoid mistakes in drawing?
In order to avoid such mistakes you can do a light “see through” sketch of the whole object to make sure that both ends are placed correctly. Simply erase the hidden parts afterwards.
How to draw blush anime?
To draw this type of blush first draw the gradient and then add the stripes over top (especially if drawing using pencil so that you don’t smudge the strokes).
What does a blush mean in anime?
In anime and manga a blush can indicate emotion like love or embarrassment or simply be a part of a characters appearance. Different types of anime blush. There are mainly four types of blush styles that are commonly used: Striped – shown with a set of small strokes. Solid – usually shaped like an oval around the cheeks.
What are the different types of blush?
There are mainly four types of blush styles that are commonly used: 1 Striped – shown with a set of small strokes 2 Solid – usually shaped like an oval around the cheeks 3 Gradient – a more natural looking blurred blush 4 Combined – A combination of stripes and gradient or solid blush
How to make blush with angled lines?
For a nicer looking blush make the outer stripes a bit shorter and the inner stripes a bit longer. Aim for a combined shape that can fit inside a stretched oval. Alternatively you can also make all of the stripes pretty much the same length.
How to draw a striped blush?
For a bigger “striped” blush you can draw it as one set of strokes going all the way across the nose area. You can again make the strokes longer in the middle and shorter at the outer edges.
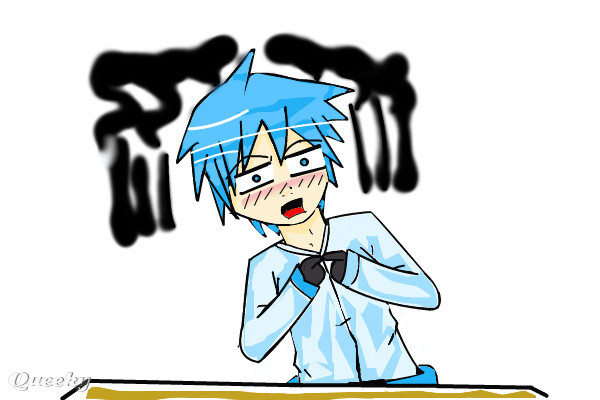
Is blushing appropriate for a more emotional face?
As you can see above this type of blush may be more appropriate for a more emotional (in this case embarrassed) face.
Is Blush a good anime?
Blush is very common in anime and manga. It’s very easy to draw and a good way to emphasize certain anime character emotions or personalities. For more on drawing anime characters with different personalities see: How to Draw Anime Characters Tutorial. For other similar tutorial see:
Popular Posts:
- 1. where does the mha anime leave off in the manga
- 2. are anime traps adorable
- 3. do do doooo anime
- 4. where to watch black butler anime
- 5. how to add anime to pictures
- 6. where can i buy anime merchandise
- 7. how to draw anime hair digital art
- 8. how to get anime license
- 9. a blessing god anime
- 10. how to watch anime at school