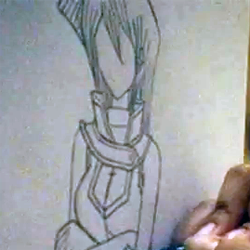
How to Draw Manga on MS Paint Steps
- Draw the guide lines.
- Draw the lineart.
- Clean up the base lines.
- Do the eye.
- Select your colors.
- ... (more items)
Full Answer
How to draw anime eyes in MS Paint?
Draw Anime Eyes in MS Paint Step 1: Eyelids. Draw the eyelids of the eye. Just two curved lines, really. Step 2: Make Eye Accesories (eyelashes, Point on End, Etc.). Basicly, add eyelashes and points, etc. Nothing special. Step 3: Start the Iris. The inside of the eye. Can be round, tall, big, or ...
How to draw an anime character?
When drawing an anime character’s body, the arms should reach approximately mid-thigh. No matter what kind of body style you’re drawing, following these guidelines will ensure that you create proportional anatomy. At this point, you will have a full-body sketch of your anime character.
How can i Improve my anime drawings?
Open up new possibilities for your anime drawings by learning to draw heads from any angle. When planning your anime drawing, it is helpful to have the ability to draw your character’s head from any angle as they move and animate across the page or screen.
Are anime drawings just Japanese?
Although some people argue that anime and manga can be just Japanese, there are a few anime shows, which are produced in the USA, but are still considered anime. Same goes for manga. Now, in this article, we are going to consider each drawing of an anime or a manga character, as an anime drawing.
How do you draw in MS Paint for beginners?
0:308:39How to Draw in Ms Paint | drawing in paint in computer - YouTubeYouTubeStart of suggested clipEnd of suggested clipSo to do that first select line shapes from the safe section and color yellow from the color.MoreSo to do that first select line shapes from the safe section and color yellow from the color.
Where can I draw anime on the computer?
13 Best Programs to Draw Manga - Anime Drawing SoftwareAdobe Photoshop. Adobe Photoshop has to be one of the most popular programs on the market, specifically for drawing and painting digitally. ... SYSTEMAX PaintTool Sai. ... Smith Macro Manga Studio. ... PGN openCanvas. ... Corel Painter. ... Comic Life. ... Pencil. ... Manga Studio Debut.More items...•
How do you make cartoons on Microsoft Paint?
0:021:13How to Draw Cartoon Arms in Microsoft Paint - YouTubeYouTubeStart of suggested clipEnd of suggested clipAnd right over here in the middle I want you to hold the left mouse button down and pull a straightMoreAnd right over here in the middle I want you to hold the left mouse button down and pull a straight line directly center all the way down to the bottom and release.
How do you make an eye in MS Paint?
Start out by drawing the outline for the eye using a thin marker. After this, draw on a thicker line at the top of the eye and then draw on the crease of the eye above this. Now, draw in the details of the middle of the eye and start to shade in around the crease of the eye and the middle of the eye.
What's the best app for drawing anime?
Chalk. Ibis Paint. Medi Bang Paint. CLIP STUDIO PRO. Jump paint. Draw Anime & Manga. Differences between Anime and Manga.
How do you create an anime?
2:3814:56How to Make Anime EXPLAINED - YouTubeYouTubeStart of suggested clipEnd of suggested clipEven maybe some sketches with different facial expressions. And different poses to really get theMoreEven maybe some sketches with different facial expressions. And different poses to really get the vibe of that character. So that everybody on the team is consistent.
How do you draw an anime girl in paint?
0:028:02Ibispaint X - How to Draw Anime Girl - YouTubeYouTubeStart of suggested clipEnd of suggested clipThis will be our guide for the eyes for the eyes draw a curve and then a circle. Inside so justMoreThis will be our guide for the eyes for the eyes draw a curve and then a circle. Inside so just thicken the lines and add eyelashes and more.
How do you make a comic strip in paint?
How to Make a Comic Strip on PaintOpen Paint. ... Create the panels first. ... Draw your comic inside the first square by selecting the shapes at the right. ... Add color by selecting the "Fill With Color" icon. ... Add text to your strip by selecting the "Text" icon.
How do you draw something in MS Paint?
Sketch your picture and upload it to your computer. If you do scan your drawing, just open the file in MS Paint in order to start turning it into a beautiful drawing, but be sure you have the original sketch saved separately somewhere else too (in case you make mistakes and need to start over).
How do I draw in paint like a pro?
1:575:12How to MS Paint - YouTubeYouTubeStart of suggested clipEnd of suggested clipIf you want to sketch in paint avoid using the color black at all costs. I'd also avoid using pureMoreIf you want to sketch in paint avoid using the color black at all costs. I'd also avoid using pure white either but it's up to you as. Long. As you don't use pure.
How do you make a flag in MS Paint?
0:013:31How to Draw National Flag in Ms Paint - YouTubeYouTubeStart of suggested clipEnd of suggested clipHello everybody today we will learn how to draw national flag using shapes in ms paint for drawingMoreHello everybody today we will learn how to draw national flag using shapes in ms paint for drawing national flag first we'll take rectangle we need to draw three horizontal rectangles of same.
How do I draw on paint on my laptop?
1:432:51How to draw on a picture with Paint - YouTubeYouTubeStart of suggested clipEnd of suggested clipButton anywhere that i go puts the brush stroke. And so then when i let go of the left mouse buttonMoreButton anywhere that i go puts the brush stroke. And so then when i let go of the left mouse button then it frees up my cursor. Again.
Why is MS Paint so hard to draw?
It's true that MS paint can be hard to draw on because of it's lack of "sophisticated" tools, but that doesn't mean you can't make great art! This will help you get an idea of how to draw basic anime/manga on Windows's default paint program.
How to add shading to a photo?
Add shading. To do this, click your skin tone, go to edit colors, and make a color that is slightly darker than your original skin tone. Pencil the outline of the shadows, then fill them in using the same color. ...
What is lineart in drawing?
Draw the lineart. This is a basic black/dark color outline of your drawings face.
Can you fill in the background of a character?
Add finishing touches! You can either fill in the background with a solid color, or you can make a scene behind your character. You can also put some clothes on her/him/it as well, if inspiration strikes!
Step 3: Start the Iris
The inside of the eye. Can be round, tall, big, or small. The whole iris doesn't usually show, except when in fear or excitement. The iris is usually darker than the eye color.
Step 5: Highlights, Baby!
Add the shine. Light shiny areas are the key. Do not put highlight everywhere, though. One or two is enough.
Step 6: Shadows
See the part under the top highlights? Shade there lightly. Light, light, light blue or green is good.
Step 7: All Done!
Well, that's it. Hope you had fun drawing with this tutorial. SEE YA!!!
How to draw anime characters?
While artists have varying preferences about how to structure an anime character’s head and face, they all start with the same basic principle: First draw a circle, and then draw a horizontal line and vertical line directly ...
How to draw anime girl eyes?
Start by sketching a curved upper eyelid, then draw a short line extending down from the outer corner of the eye. Leave the inner corner of the eye open for a softer look. Then, add a circle in the middle of the eye as the iris. Draw a smaller circle—the pupil—in the middle of the iris.
What is the focal point of anime?
When drawing anime characters, the eyes are typically a focal point, while the nose and mouth remain simple.
How long should an anime character's legs be?
The legs of an anime character should be approximately as long as the top half of the character, from the top of the head to the waist. Finally, add in the arms. A good rule of thumb is to align the elbow with the character’s waist, and then extend the rest of the arm (including the hand) to about mid-thigh.
How do anime faces start?
The basic anatomy of an anime face starts with a circle with a vertical line and horizontal line directly through the center.
How to make a reflection in the eye?
Leave the inner corner of the eye open for a softer look. Then, add a circle in the middle of the eye as the iris. Draw a smaller circle—the pupil—in the middle of the iris. To create primary and secondary light reflections, add in one or two additional circles within the iris.
What pen do you use to highlight a character?
While you will mostly ink with a black pen, it can also be helpful to have a white jelly pen on hand—you can use this to add highlights, like the reflection points in the character’s eyes. You may also choose to add additional colors with colored pencils or medium of your choice.
What is the difference between anime and manga?
It is worth pointing out the difference between these two styles. Anime is the animated version, while manga are just still images. Therefore, anime can be watched on TV, like a cartoon, while manga is similar to a comic book.
How to draw anime characters tutorial?
Anime has a very distinguishable style. When drawing anime, there are a few rules to follow. Most importantly, the exaggerated features:
Anime drawing tutorials for beginners step by step
If you are a beginner and are trying to learn how to draw anime, keep in mind that you can learn, but you have to practice. Don’t give up! Furthermore, the good thing about anime drawings is that you can turn anything into an anime. Even your own self-portrait.
How to draw anime face step by step tutorial?
These step-by-step tutorials focus on the face, which, as it turns out, is pretty easy to do:
What to add to anime drawing?
Add clothing to your anime drawing to give your character personality .
Who teaches you how to draw anime noses?
When you’re learning how to draw anime lips, eyebrows, or other specific facial features, it’s helpful to have focused instruction—and noses are no exception! In this course, Skillshare instructor Leon F. Andersen teaches you how to draw noses with varying degrees of detail .
What is Sensei's course?
Skillshare instructor Sensei’s course is a great masterclass in anime faces. If you’re learning how to draw anime for beginners, Sensei’s advice will help you understand the fundamentals of anime characters and draw them with ease.
What is the best thing about anime character design?
Though you may never have heard of a ninja skateboarder or a singing surfer, one of the best things about anime character design is that there are no rules! Feel free to combine different character types and styles to create a character that represents you and your interests.
Why is anime so popular?
Part of what makes anime so popular is that characters are known for having loud expressions and emotions. To help convey these sentiments through your anime character’s face, follow along as artist Enrique Plazola teaches you how to draw anime eyes in four different styles!
What is the best thing about digitizing anime?
One of the best things about digitizing your anime drawings is that you have limitless options for posing and positioning your characters. Character designer and animator McCoy Buck shows you how to do exactly that using digitized vector points for reference.
Why are proportions important in anime?
Anime drawing and character design is unique in that it allows for open-ended creativity while still remaining within standard design principles, like proportions.
Introduction
Hello! In this tutorial, let's learn how to draw some anime or manga styled portraits! Please note that I mainly specialize in female portraits (at least for now ;u;)
Anatomy
For drawing pretty and anatomically correct faces, let’s see how the famous loomis head method works. Here is a step by step process of how to use the Loomis head method. This method is a baseline to a typical head and does not serve as a concrete rule to varying head shapes and proportions!
Hair
For the hair, I recommend visualizing the hair as flat strands that twist and turn in 3D space. This is definitely more of a simplification that I use when drawing in anime style rather than realistic. But this helps with drawing hair shapes that seem convincing! ;) I also imagine the back layer of hair as mostly in shadow (pink).
Facial expressions
Although I typically don't draw strong facial expressions, here is a rough representation. Lifting of eyebrows and bottom eyelids usually indicate a happy or laughing emotion (1).
Poses and props
For female figures or characters, I like to include flowers or accessories as props for a more elegant pose. Below are examples of poses with props such as single flower stems and drinks. Even without props, in half body or full figure portraits, the hands and arms play important roles in achieving expressive poses that convey certain attitudes.
Composition
Situating facial features or body parts where lines of the rule of thirds lie will direct more attention to those areas and less to areas that are not on the lines. This is why aligning the eyes at the first horizontal line of the rule of thirds can do justice to a portrait.
Painting portrait demonstration
First, make a sketch (for me, my first sketch will be my final line art). I use dae pen 4 for sketching, which can be downloaded here. Today, I decided to just go with a typical school girl for an anime styled / semi-realistic bust up portrait!

Popular Posts:
- 1. what to draw anime generator
- 2. what's the difference between cartoon and anime
- 3. where to watch ensemble stars anime
- 4. are vapes allowed at anime expo
- 5. where to find anime pictures
- 6. what anime to start with
- 7. how to draw a creepy anime smile
- 8. is soul eater a good anime
- 9. are all anime on crunchyroll also on vrv
- 10. is another anime complete