- Use a pencil and draw a stick figure. Draw an egg shape for the head and then draw the rest of the body using lines.
- Add some form to your stick figure. Add circles where there are joints and form the body by adding more lines.
- Draw the face in a sweeping motion. You can choose any expression for your anime boy, but most anime boys have sharp, defined features, with eyes slanting more at ...
- Draw the clothing for the figure. Since the figure is already complete, all you have to do is add onto the body the outfit you want for him.
- Ink the drawing with a black, sharp pen (make sure it's fine point but defined). Remember to add fine details like the pupils of his eyes.
- Erase the other lines you used to clean it up.
- Color the drawing with the tools of your choice. Watercolor is recommended, but you can also use colored pencils.
How to draw anime for beginners?
Beginner Guide to Drawing Anime & Manga
- Make Light Line Drawings First. Draw using light lines first and then trace over them with darker lines once you are sure that everything is in the right place.
- Use Guide/Construction Lines. Use guide lines to help yourself draw. ...
- Plan Out Your Drawing & Draw Larger to Smaller. Estimate your proportions before you start drawing. ...
- Keep Different Parts of Your Drawing in the Same Stages of Completion. Try and keep the various objects in your drawing in roughly the same state of completion. ...
- Draw Things That Are Hidden. It’s sometimes a good idea to draw things that are hidden by something else. ...
- Do Drawing Exercises. As a beginner artist you can really benefit from some fairly simple exercises of drawing lines and basic geometric shapes.
- Study the Anime Style. To make art that looks like anime and manga you have to understand their defining characteristics. ...
- Check for Mistakes. If you are having trouble spotting your mistakes turn your drawing upside down or hold it up to a mirror.
How to draw anime boy step by step?
Steps Download Article
- Use a pencil and draw a stick figure. Draw an egg shape for the head and then draw the rest of the body using lines.
- Add some form to your stick figure. Add circles where there are joints and form the body by adding more lines.
- Draw the face in a sweeping motion. ...
- Draw the clothing for the figure. ...
What are the steps to drawing anime?
The shape of the lower part of the face is as follows:
- Two downwards lines slightly angled inwards (towards middle of face)
- A pair of light curves
- Two more downwards lines that face more inwards than previous pair
- Small curve for the chin
How to draw simple anime eyes?
How to Draw an Anime Eye Step by Step
- First Step. Let’s draw the eyebrow over the foundation of our eye. The eyebrow will be slightly longer than the eye.
- Second Step. Let’s add some eyelashes and make the lines a bit darker. ...
- Third Step. Add some shading and shadows! ...
- Fourth Step. Let´s add some highlights! ...

How do you draw a teenage anime boy?
0:498:17【HOW TO DRAW】 Male Manga Character - YouTubeYouTubeStart of suggested clipEnd of suggested clipYou can use a normal pencil as well HB or B let's work best in my experience. Then I extend theMoreYou can use a normal pencil as well HB or B let's work best in my experience. Then I extend the circle. Because a head is a bit more oval than a circle.
How do you draw an anime full body boy?
1:299:03How To Draw Anime Male Body Proportion - YouTubeYouTubeStart of suggested clipEnd of suggested clipAnd then here comes the torso. Now it's important for the torso a lot of beginners. Always draw theMoreAnd then here comes the torso. Now it's important for the torso a lot of beginners. Always draw the shoulder to hide and actually the torso should be curved like this because the shoulder.
How can I draw my own anime?
5 Simple Steps to Drawing AnimeStep 1: Create the Basic Structure of the Face. First, you will create the general composition of the character's face. ... Step 2: Add Facial Features. ... Step 3: Draw the Hair. ... Step 4: Add the Body. ... Step 5: Add Details and Ink the Drawing.
How do you draw Goku?
1:0215:13How To Draw Goku For BEGINNERS! - Step By Step Tutorial! - YouTubeYouTubeStart of suggested clipEnd of suggested clipWe can start by drawing the shape of his face we are going to do a frontal pose. Next I'm gonna drawMoreWe can start by drawing the shape of his face we are going to do a frontal pose. Next I'm gonna draw the eyebrow. From this area right there and as you can see it gets thicker towards the edge.
How do you make an anime smile?
2:3138:54HOW TO DRAW SMILING HAPPY EXPRESSIONS (Real Time)YouTubeStart of suggested clipEnd of suggested clipThis will be doing the same sort of thing but just a little bit wider. And sweeping down to theMoreThis will be doing the same sort of thing but just a little bit wider. And sweeping down to the outside edge a bit more. And then i'm just going to come down. Here bring in that shape.
How do you make Naruto?
0:0013:37How to Draw Naruto | Naruto Shippuden - YouTubeYouTubeStart of suggested clipEnd of suggested clipGo around to the bottom. And back up to the top. Well draw in that highlight circle on the top leftMoreGo around to the bottom. And back up to the top. Well draw in that highlight circle on the top left corner. And then we'll draw the pupil right in the middle of the largest circle draw a circle.
How do you draw a among US player?
0:007:13How To Draw Imposter Attack | Among Us - YouTubeYouTubeStart of suggested clipEnd of suggested clipLet's draw the top of the head coming in towards the fold starting from the top. Left out down andMoreLet's draw the top of the head coming in towards the fold starting from the top. Left out down and then in towards the fold. Let's draw another fold underneath we step back out go down and then in.
How can I make a good anime character?
It's a good idea to portray the character in the act of doing something that most defines them.Sketch a Wireframe. ... Correct Proportions. ... Outline the Shapes to Create a Skin Layer. ... Draw Facial Proportions. ... Add Clothing, Decoration, and Hair. ... Tidy Your Outlines and Ink Your Drawing. ... Refine Shading and Color.More items...•
How can I turn myself into an anime character?
03A step-by-step breakdown of this process has been provided below (pictures included)Step 1Download the Snapchat App. ... Step 2Open Snapchat App on your mobile device. ... Step 3Search for the Anime Style Filter on Snapchat. ... Step 4Turn Yourself into an Animated Character. ... Step 5Upload your anime filter-ed video to TikTok.
How do you draw a legendary Super Saiyan Broly?
1:5441:05How to Draw LEGENDARY SUPER SAIYAN BROLY (Dragon Ball SuperYouTubeStart of suggested clipEnd of suggested clipSo I'm gonna draw a line going down the center of that circle. And I'm gonna find the chin. NowMoreSo I'm gonna draw a line going down the center of that circle. And I'm gonna find the chin. Now right here and I'm gonna draw two lines going up. So that's going to be released chin.How to Draw LEGENDARY SUPER SAIYAN BROLY (Dragon Ball Superhttps://www.youtube.com › watchhttps://www.youtube.com › watchSearch for: How do you draw a legendary Super Saiyan Broly?
How do you draw Super Saiyan 5 Goku?
0:5648:59How to Draw Goku SSj5 with Ohuhu Brush Markers | Drawing Tutorial | 4KYouTubeStart of suggested clipEnd of suggested clipAlways we will start with the eyes. So draw the wrinkles between the eyebrows. At the center of theMoreAlways we will start with the eyes. So draw the wrinkles between the eyebrows. At the center of the guideline. From the wrinkles. We will draw the eyebrows. Using the length of the line to draw.How to Draw Goku SSj5 with Ohuhu Brush Markers | Drawing Tutorial | 4Khttps://www.youtube.com › watchhttps://www.youtube.com › watchSearch for: How do you draw Super Saiyan 5 Goku?
How do you draw ssj4?
2:3530:43How To Draw Goku SSj4 | Step By Step | Dragonball - YouTubeYouTubeStart of suggested clipEnd of suggested clipIt's kind of hard to draw it in with a black marker it's just like if you were coloring it would beMoreIt's kind of hard to draw it in with a black marker it's just like if you were coloring it would be red around here. So even Irish so we've a half circle.How To Draw Goku SSj4 | Step By Step | Dragonball - YouTubehttps://www.youtube.com › watchhttps://www.youtube.com › watchSearch for: How do you draw ssj4?
How to draw a male anime face?
Male anime character face drawing step by step. Draw the basic shape of the head starting with a vertical line to help you make sure both halves are even. Position the facial features as described earlier. Draw the hair after placing all of the facial features.
How to draw a male protagonist?
To draw a male “protagonist” character with their normal expressions draw the eyebrows in their natural position and draw the eyes with fairly large pupils/irises. If you want a friendly looking character draw the mouth with a light smile.
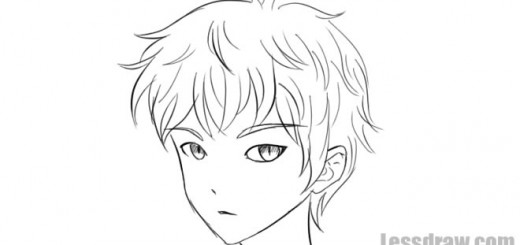
What is the concerned expression in anime?
The concerned or “thinking” expression is one that the “intellectual” character is likely to make. Anime intellectual male character concerned face drawing. For the concerned expression draw the eyebrows lower down and closer together with some wrinkles in between them.
What is an anime intellectual?
Anime intellectual guy face drawing. The “intellectual” character type in anime and manga does not necessarily mean a shy or weak male character. On the contrary quite often these characters can be both physically though and intelligent. Often these tend to be the school council president or some type of leader.
What is an anime guy?
Anime guy face drawing. The “average guy” character is usually meant to be someone the viewer can relate to or cheer for. These are often the protagonists of anime shows and manga or the lead male character if the protagonist is a female. Somewhat messy medium length hair is very common for these types of characters.
What are the characteristics of anime?
Before going into drawing specific character archetypes it’s a good idea to first analyze the characteristic features of male anime faces. While there is quite a bit of variation in the anime and manga style generally all anime characters tend to have large eyes, small noses amd simplified mouths with no lips.
What is a happy face in anime?
Anime guy happy face drawing. A happy smile can be one of the expressions this type of character is likely to have. Usually this is a look the main male character can give to a character they like such as the female protagonist. Anime male character happy face drawing.
How to draw anime head?
1. Draw an oval and divide it into 4 sections. This will be the basic outline of your anime character’s head. The proportions don’t have to be exact, but make the oval narrower at the bottom since that will be the chin. Once you’ve drawn the oval, draw a horizontal line through the center of it. Then, draw a vertical line through the center ...
How to draw a nose in anime?
To draw your character’s nose, draw a short, simple vertical line along the center of the face at the halfway point between the horizontal line and the chin.
How to draw hands well?
Community Answer. The best trick for drawing hands well is to study your own hands first. Notice the shape, color, texture, angles, etc. Draw your hand in dozens of different positions and in different lighting. This isn't a shortcut, per se, but it's an exercise that will improve your drawing.
How to draw a stick figure?
Make the hands about 1/5 the length of the arm, and make the feet about 1/6 the length of the legs. To get the proportions right, make your stick-figure outline about 7 times as tall as your character’s head. Have the arm lines start about 1/5 of the way down the line you draw for the torso.
How to draw a short hair character?
However, if your character’s hair is going to be short, draw a narrow oval on each side of the head. Have the top of the ears line up with the horizontal line running through the center of the face, and have the bottoms line up with the bottom of the nose. Then, draw the flaps of the ear inside each oval.
How to make your character's nose bigger?
Make the line longer if you want your character’s nose to be big. Make the nose the smallest feature on your character’s face. The nose will overlap with the vertical line you drew. To see it better, make it darker than the vertical line, or erase the vertical line around the nose.
Can anime characters draw hair?
The hairstyle you choose for your character is up to you, but generally, anime hair features pointed ends and distinct sections. You can draw a short, buzzed hairstyle, a medium-length style, or long, flowy hair. Whichever hairstyle you choose, avoid drawing individual strands of hair.
How to draw anime characters?
While artists have varying preferences about how to structure an anime character’s head and face, they all start with the same basic principle: First draw a circle, and then draw a horizontal line and vertical line directly ...
How to draw anime girl eyes?
Start by sketching a curved upper eyelid, then draw a short line extending down from the outer corner of the eye. Leave the inner corner of the eye open for a softer look. Then, add a circle in the middle of the eye as the iris. Draw a smaller circle—the pupil—in the middle of the iris.
How long should an anime character's legs be?
The legs of an anime character should be approximately as long as the top half of the character, from the top of the head to the waist. Finally, add in the arms. A good rule of thumb is to align the elbow with the character’s waist, and then extend the rest of the arm (including the hand) to about mid-thigh.
What pen do you use to highlight a character?
While you will mostly ink with a black pen, it can also be helpful to have a white jelly pen on hand—you can use this to add highlights, like the reflection points in the character’s eyes. You may also choose to add additional colors with colored pencils or medium of your choice.
What is the difference between a character's nose and mouth?
The character’s nose and mouth will typically be much smaller and simpler than the eyes. The nose, for instance, may just be two small lines that represent the nostrils. Similarly, the mouth may be a simple curved line.
How to make a reflection in the eye?
Leave the inner corner of the eye open for a softer look. Then, add a circle in the middle of the eye as the iris. Draw a smaller circle—the pupil—in the middle of the iris. To create primary and secondary light reflections, add in one or two additional circles within the iris.

Popular Posts:
- 1. where to watch hello kitty anime
- 2. how to draw good anime
- 3. what to do at anime conventions
- 4. a game like overlord the anime
- 5. what are anime movies
- 6. did shinobu die in the anime
- 7. how anime started
- 8. can we wear superhero cosplays in anime cons
- 9. what is redo of healer anime about
- 10. are you the one anime gemelle