
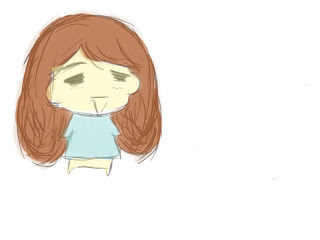
How to Create a Slick Anime Character in Photoshop
- Step 1. Use the ruler to create two guides in the center of the document, a horizontal and vertical one. Use the center...
- Step 2. The next line will present the side of our character's head. Select the Line Tool, make sure the Weight is set...
- Step 3. Now we are going to make a "freehand" line. ... It's always good...

8:33
32:54
So we are doing a clean line art here. I'm just gonna choose the second one a brush preset. It's theMoreSo we are doing a clean line art here. I'm just gonna choose the second one a brush preset. It's the default brush brush preset for Photoshop cs6 and the size should be around three pixels.
How to make anime art in Photoshop?
How to Create an Anime Artwork in Photoshop. Step 1 – The Outline. Most people draw the outline on paper then use a scanner to load the outline into Photoshop. Begin by opening the outline image ... Step 2 – Separating the Outline. Step 3 – Base Color. Step 4 – Adding Shadows. Step 5 – Dodge and ...
How to create a slick anime character in Photoshop?
How to Create a Slick Anime Character in Photoshop 1 Use the ruler to create two guides in the center of the document, a horizontal and vertical one. ... 2 The next line will present the side of our character's head. Select the Line Tool, make sure the Weight is set at 1px. 3 Now we are going to make a "freehand" line. ... More items...
How do I create a character sketch in Photoshop?
Create a New 800 x 800px canvas (Ctrl + N) with a white background, and you're ready to begin. With any character sketch, the very first thing you'll need to do is to draw a very rough idea of the layout. In this case the layout is for a bust, or portrait, drawing, so you'll be drawing the head shape, neck and shoulders.
How do I Make my anime character look good?
When you move on to the hair lines, start with the top of the head and the bangs as you will find the rest of the hair easier once you have these down. I've added a parting at the top of the head, as you can see below, which is another way to add that little extra bit of detail to your anime character.

How do I Photoshop myself into an anime character?
0:006:44easiest way to add anime characters to your pictures with your phoneYouTubeStart of suggested clipEnd of suggested clipSo you're going to go to pics. Art. You're going to click on the plus sign and pick the picture thatMoreSo you're going to go to pics. Art. You're going to click on the plus sign and pick the picture that you want to use so I'm going to be using this one. You're going to go to the bottom to add photo.
How do I make an anime with pictures in Photoshop?
Follow this tutorial to quickly convert your photo to a cartoon in Photoshop.Add your image. Choose the image you want to cartoonize into Photoshop.Convert your image into a Smart Object so you can make nondestructive edits. ... Apply the Poster Edges effect. ... Save your cartoonized photo. ... Go to Filter › Liquify.
How do you create a character in Photoshop?
0:5512:25How To Create and Animate Basic Characters in Photoshop and After ...YouTubeStart of suggested clipEnd of suggested clipNow you can change the fill and the stroke. I'm gonna change the fill to blue and we'll change theMoreNow you can change the fill and the stroke. I'm gonna change the fill to blue and we'll change the stroke to and no stroke. Now you can go ahead and draw the body of your character.
How do you make anime characters?
8 Steps To Create an anime character online for freeChoose the artistic style you like. ... Choose a skin tone. ... Choose the eye. ... Add tear and eyebrow. ... Choose the nose & mouth shape. ... Change the hairstyle. ... Add gesture and accessories. ... Add texts to express yourself.
How do you turn a picture into an anime style?
How To Turn Your Picture into Anime Drawing & CartoonSnapchat Anime Filter.ToonApp: AI Cartoon Photo Editor, Cartoon Yourself.Cartoon Photo Editor.Fiverr – Hire an artist to draw an anime character.ToonMe – Cartoon yourself photo editor.Cartoon Yourself.Cartoon Image Creator.Avatoon BY IDEALABS.More items...
Can you Cartoonize a picture in Photoshop?
With Photoshop, you can transform your photos with a whole host of artistic photo effects. In fact, you can even use Photoshop to create cartoon images from your pictures.
Can you draw characters in Photoshop?
11:1248:12Drawing a character in photoshop - YouTubeYouTubeStart of suggested clipEnd of suggested clipSo we started with this and then let's see if we're actually evolving or we just we started withMoreSo we started with this and then let's see if we're actually evolving or we just we started with this this was a really rough sketch. And then now we move to this it looks a little bit more polished.
How do you make a 2d character in Photoshop?
1:1515:04Draw 2D Character in Photoshop for Unity (2D Platformer Tutorial Part1)YouTubeStart of suggested clipEnd of suggested clipAnd add a new layer inside it name it the outline. The curvature tools allow you to lay point thenMoreAnd add a new layer inside it name it the outline. The curvature tools allow you to lay point then control whether they are a curve point or a color point.
How do you make a 3d cartoon character in Photoshop?
2:2829:20Create & Animate 3D Characters in Photoshop & Fuse Tutorial - YouTubeYouTubeStart of suggested clipEnd of suggested clipNow we've got this one down here these were all created in Adobe fuse as 3d models and then broughtMoreNow we've got this one down here these were all created in Adobe fuse as 3d models and then brought into Photoshop. And then I animated them got the right poses adjusted the lighting the rotation.
What is the best anime character creator?
2. The Best 10 Anime Character Creator 2022Crypko Free Avatar Maker. ... MakeGirlsMoe. ... Charat.me Anime Character Creator Online. ... Cartoonify. ... Character Creator. ... Avatar Maker: Anime. ... SuperMe. ... Avachara.More items...
What is the #1 anime?
Anime Top 10Top 10 Best Rated (bayesian estimate) (Top 50)#titlerating1Fullmetal Alchemist: Brotherhood (TV)9.082Steins;Gate (TV)9.043Clannad After Story (TV)9.028 more rows
Is there an app where you can create your own anime character?
Avatar Maker: Anime on the App Store.
Do anime characters have eyelashes?
In an anime drawing, the eyes are often an important and defining factor of the image, so I've given a few examples of different styles of eye that you could try for your drawing. Female characters often have eyelashes of some sort, and male characters tend not to.
Do you need to add guides to anime?
As you become familiar with drawing in the anime style, you may not need to always add these guides, and as your own sketch may be a different size to mine, I can't give an exact distance to add the guidelines, so for now, add yours so they appear a similar distance from the red line as mine.
Can you delete hair sketch?
Once you've finished making your new hair sketch, you can delete the "hair1" layer. Now you'll need to erase any surplus lines from your "sketch" layer that would be covered by hair, like you did for the clothing. In this case, it will be the sides of the head and some of the clothing where the longer bangs are in front.
How to remove front hair in Adobe Illustrator?
Select the character in the workspace, and click the “ Composer” Icon located at the top of the left toolbar. In the Scene Manager Panel, click on the Layer Manager Tab (at the bottom), select FrontHair, and press Delete. Click Back Stage to exit ComposerMode. You are now ready for animation!
How many layers should I draw in Step 4?
Apply Step 4 to draw the different parts of the face that corresponds to the eyes. You should end up with 10 layers in total ordered in pairs of Brows, blinks, pupils, eye whites, and eye masks.
How to redraw a character's neck?
You can do this by using the pen tool if you only have a mouse, and then merging the shapes with the body layer (Cmd/Ctrl+E), or with the brush tool if you have a drawing tablet.
How to merge a clipping layer?
Take each clipping layer and merge it with its respective layer. Simply select each clipping layer and press Cmd/Ctrl+E, and that will merge it with its corresponding layer. Face Shade with Face, Body Shade with Body, etc.
How to make an outline in Photoshop?
Most people draw the outline on paper then use a scanner to load the outline into Photoshop. Begin by opening the outline image into Photoshop. Use the Levels tool (Image > Adjustments > Levels) to correct the contrast of the outline.
What is Luminar AI?
Luminar AI lets you turn your ideas into reality with powerful, intelligent AI. Download the photo editor and see how you can completely transform your photos in a few clicks.
Popular Posts:
- 1. what is the best romance anime on netflix
- 2. how to draw anime kimono
- 3. do as infinity anime friends 2017
- 4. cómo dibujar en anime
- 5. what order do i watch fate anime in
- 6. don t watch an anime called boku
- 7. who is the best anime character
- 8. what would i look like in anime
- 9. how to make your own anime avatar
- 10. how to get anime filter in tiktok