There is no doubt that Adobe Photoshopis one of the best software to draw anime and manga art. Its ease of use, broad range of features, customizable options, and user-interface are some of the core components that make it stand out. Adobe PhotoshopCC has dozens of premium techniques.
Full Answer
How to make anime art in Photoshop?
How to Create an Anime Artwork in Photoshop. Step 1 – The Outline. Most people draw the outline on paper then use a scanner to load the outline into Photoshop. Begin by opening the outline image ... Step 2 – Separating the Outline. Step 3 – Base Color. Step 4 – Adding Shadows. Step 5 – Dodge and ...
What is the best software to draw anime?
Adobe Photoshop CC There is no doubt that Adobe Photoshop is one of the best software to draw anime and manga art. Its ease of use, broad range of features, customizable options, and user-interface are some of the core components that make it stand out. Adobe Photoshop CC has dozens of premium techniques.
Is Corel Painter good for drawing manga?
Corel Painter is a great digital art software, especially for drawing manga and anime art. The application is compatible with both windows and mac. What makes it stand out is that you can use its broad range of premium features to create an impressive piece of art.
What is the best software for comic and manga artists?
It has quickly become the go-to software program for comic and manga art creators, thanks to the traditional and natural feel it offers. Clip Studio Paint Pro has advanced digital painting and drawing features.

Can you draw anime in Photoshop?
Most artists create manga with Adobe tools since drawing anime in Photoshop is very convenient. In this program, you get a huge set of brushes and a gorgeous color palette to create comics.
What software do anime artist use?
10:5613:42Software Use in the Anime Industry - YouTubeYouTubeStart of suggested clipEnd of suggested clipPeople online have been successful in emulating anime style backgrounds using blender as their 3dMorePeople online have been successful in emulating anime style backgrounds using blender as their 3d tool and drawing on top of it and clip studio or Photoshop.
Do professional artists use Photoshop?
Many artists are known to use Photoshop or Illustrator, and you might be unsure about which one is right for you. These are two incredibly powerful systems. Both offer a variety of amazing functions, but they do have differences. Photoshop might be right for some while Illustrator might be right for others.
Do digital artists use Photoshop?
Quick summary ↬ Photoshop is a magical tool for digital artists and photographers, and it rules the digital imaging world. It is not just a tool, though; Photoshop is a blank canvas that invites you to perform magic with your creativity.
What software does demon slayer use?
ToonzDeveloper(s)Digital Video S.p.a.Operating systemmacOS, Microsoft WindowsPlatformx86, x86-64Type2D animation softwareLicenseProprietary7 more rows
What software do Japanese artists use?
Among most common programs is SAI (PaintTool SAI) which is less known outside of Japanese market but is a very powerful tool, developed by Systemax (they offer a free 30-day trial version, the full version costs only 5250 yen or about $58).
Who uses Photoshop the most?
Here are the top 10 jobs that use photoshop:Photographer Jobs (Overview)Graphic Designer Jobs (Overview)Designer Jobs (Overview)Internship Jobs (Overview)Marketing Manager Jobs (Overview)Interactive Developer Jobs (Overview)Web Developer Jobs (Overview)Graphic Artist Jobs (Overview)More items...•
Is procreate better than Photoshop?
Procreate is a powerful and intuitive digital illustration app available for iPad. Overall, Photoshop is the better program among the two. While Procreate has astounded users year after year for its incredible illustration capabilities, Adobe Photoshop is our overall winner.
Is it better to draw on Photoshop or Illustrator?
Illustrator drawings can be scaled and printed at any size without loss of image quality. The lines are very clean and sharp, which is great for logo design and illustration. Photoshop drawings can be more similar to drawing with traditional media like pencils, or chalk, or paint, if that's what you want.
How much does it cost to hire a Photoshop artist?
$15–$30/hr.
Is Photoshop better than Krita?
Krita cannot be considered as an alternative of photoshop as it is only used for digital drawing, not for image editing. They may have similar purposes but are actually different. While Photoshop can be used for drawing and making digital art, Krita is the better option for painting.
What do most artists use for digital art?
Clip Studio Paint is my software of choice for digital art and illustration. Although you can add custom tools to your setup, the standard pencils, pens and brushes bring the feel of traditional drawing to the digital space. In short: very few tools feel as natural as this one.
What is the best software for drawing anime?
There is no doubt that Adobe Photoshop is one of the best software to draw anime and manga art. Its ease of use, broad range of features, customizable options, and user-interface are some of the core components that make it stand out. Adobe Photoshop CC has dozens of premium techniques.
Why is Photoshop so good?
The paint symmetry, variable fonts, copy and paste layers, tooltips, and properties panel are some of the core design features that make Adobe Photoshop CC a game-changer. The reason why Photoshop is so good is that it offers so much under one roof. Graphic design, digital art, photo-editing, etc.
What is Clip Studio Paint?
Clip Studio Paint also has one of the most crucial features when it comes to drawing anime and manga art, and that is a stabilization setting for drawing that beautiful line art. Related: Line art and line drawing. Related: Line art mastery.
What is the best drawing software for manga?
ArtRage stands out as the best art software for drawing manga and anime due to its realistic features. The intuitive and beginner-friendly drawing software is designed to bring out the best in creativity. It tends to provide a high level of realism.
What is Photoshop CC?
Adobe Photoshop CC has dozens of premium techniques. They include frequency separation, spot healing, dodge, and burn, among others. In addition to that, it provides you with composition techniques that you can use to create one image from multiple photos.
What is PaintTool Sai?
For artwork personalization and ease of use, PaintTool Sai comes with custom brushes that help you to create crisp work. Even though the website/webpage (at the time of writing) seems like it’s still living in the 1990s, the software is being updated and is in wide use throughout the world.
Does Clip Studio Paint have a bucket tool?
One super nice feature that Clip Studio Paint also has is the ability to fill your layers with a base color with the bucket tool while you might feel like this is so basic. Well, CSP has taken the bucket fill tool a bit further, and it actually works like magic when you use it.

Step 1 – The Outline

Most people draw the outline on paper then use a scanner to load the outline into Photoshop. Begin by opening the outline image into Photoshop. 1. Use the Levels tool (Image > Adjustments > Levels) to correct the contrast of the outline. You can do this with the Levels tool by moving the black and white input sliders towards th…
Step 2 – Separating The Outline
- In this step, you’ll learn how to separate the outline and the background into two layers. This will also make the outline slightly thinner. You’ll also learn how to dissect the outline without any jagged edges using the Load Selection from Layercommand. In the above image, you can see the difference between using the Magic Wand tool and the Load Selection from Layer command. Th…
Step 3 – Base Color
- Now that we have the outline and white background separated, we can add the base color. 1. Add a new layer below the white layer. 2. Select the Magic Wand tool and, in the option bar, set the Tolerance to 50. 3. In the option bar, checkmark the Contiguous and Sample All Layers options. 4. With the Magic Wand tool selected, click where you want to add color. 5. Expand the selection b…
Step 4 – Adding Shadows
- In this part, you’ll learn how to add shadows to the image. One important technique from this step is how to select the correct color. 1. Create a new layer and position it between the white layer and the base color layer. 2. Select the Magic Wand tool and set the tolerance to 1 (so that it will only pick one color) and uncheck the Contiguous and Sample All Layers options. 3. Select the Brush t…
Step 5 – Dodge and Burn
- The Dodge and Burn tool will be used to give a gradient tone effect to the solid colors. 1. Duplicate the layers with the base color and shadow then position them above the original base color and shadow layers. The new layers will be used for dodging and burning while the old layers will be used to load selection with the Magic Wand tool. Select the layer with the base color and use th…
Step 6 – Adding Reflected Light
- In this step, you’ll learn how to add light reflected from the ambient light. 1. Use the same setting as previously used for the Magic Wand tool. 2. Turn on the “Other Dynamics” setting in the Brush palette (Window > Brushes). 3. Set the Brush hardness to 0%. 4. For this image, a dark purple color was used to shade the area with no reflected light. The light source is from the left of the image …
Step 7 – Coloring The Outline
- Coloring the outline will add more detail to the final image and it’s easy to do. 1. Leave the brush presets on. 2. In the Layers palette, select the layer with the outline then lock the transparent pixels by clicking on the button. 3. Use the Brush tool to color the outline using a color that is close to the outline. 4. Keep using the Eye Dropper tool to select the color beside the outline.
Step 8 – Creating The Smokes
- Now you’ll learn how the smoke swirling around the characters were created. 1. Create a new layer for the clouds. Use the Brush tool with a hardness of 100% and paint some zigzag shapes for the smoke. 2. Use the Smudge tool to smudge it in the motion shown above. 3. Use the Dodge and Burn tools to create volume on the smoke so that it looks 3D. 4. Load the selection (Select > Loa…
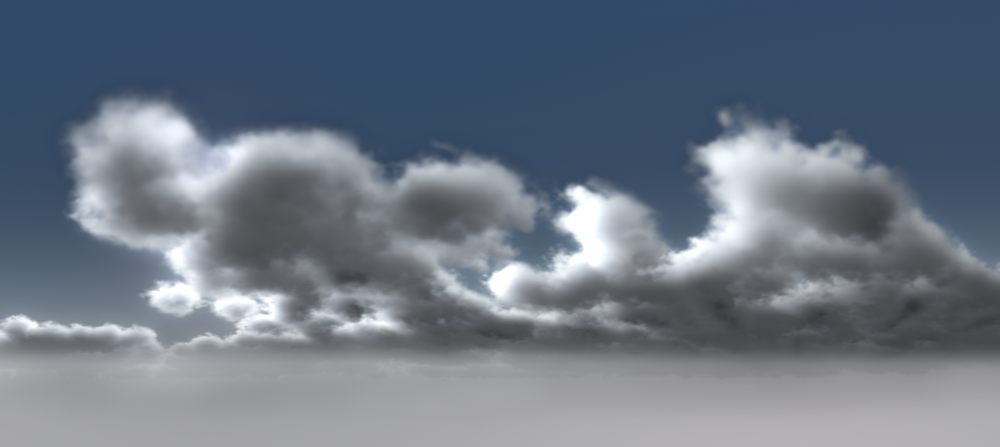
Step 9 – Creating The Cloudy Sky
- Creating the cloudy sky uses a similar process as the previous step. 1. Create a new layer for the sky and name the layer “sky”. Use the Gradient Tool to create a gradient like the image above (#1). 2. Create a new layer above the skylayer and name this “clouds”. Use the Brush tool and paint some lines to create the shape of the cloud. 3. Use the Smudge tool to smudge the cloudlayer i…
Step 10 – Adding Light
- Create a new layer and name this layer “light”. Move the layer to the very top so that it is above all the other layers.
- Select the Brush tool. In the Brushes palette (Window > Brushes), checkmark the Other Dynamicsoption.
- Set the brush hardness to 0% for soft edges.
- Create a new layer and name this layer “light”. Move the layer to the very top so that it is above all the other layers.
- Select the Brush tool. In the Brushes palette (Window > Brushes), checkmark the Other Dynamicsoption.
- Set the brush hardness to 0% for soft edges.
- Select white as the foreground color then paint the areas where you want the light to appear. The image above shows the areas that were painted.
Popular Posts:
- 1. where is the anime wow from
- 2. how to draw anime jackets
- 3. how is anime created
- 4. where to watch yes no maybe anime
- 5. is naruto going to die in boruto anime
- 6. is the aot anime ending going to be different
- 7. how to make a anime oc
- 8. when is noblesse anime coming out
- 9. a caring girl anime
- 10. is there a way to watch dubbed anime on crunchyroll